It's been a minute!

Life on the farm really has gotten away from us the last few months so this post is to catch you all up on ‘the happenings,’ the ‘not happenings’ and the ‘should be happenings.’

Let me first catch you up on the use of our new Harvest Right Freeze Dryer. Again, this is not an advertisement, no sponsored review, just me chit chatting with all of you. We got the medium size computerized machine with an oil free pump.

This model fits four trays at a time when processing food and depending on what you are freeze drying, you can do ‘like’ products at one time. For instance, different kinds of berries can go into the freeze dryer at the same time. We’ve processed blueberries, strawberries and Marionberries all the same time when we had ‘leftover’ loads. It worked beautifully. Since the freeze dryer is computerized, all steps to process appear on the screen and is truly a no brainer. Reminder: Freeze Drying preserves the nutrition value of your food like no other process. Food retains 97-99% of it’s value.

Like I said we purchased the medium sized freeze dryer from Harvest Right but because of the abundance of food we process each year, we should have purchased the larger machine, however it only holds two more trays than what we have so . . . there’s that. It really wouldn’t have made much difference.

We paid $3.195.00 for the machine and $1,495.00 for the oil free pump. We also purchased extra trays ($69.00,) silicone mats x 2 ($32.95 each,) Mylar bags ($23.95,) silicone food molds ($69.00,) 50-pak oxygen absorbers x 6 (19.95 each) - which are amazing!!! I also got the freeze drying recipe book (24.95) but I haven’t used it once. I do use a freeze drying log book that I got on Amazon and highly recommend and paid only $10.00 for it.

Here’s the link if you want to check it out. Again this is NOT an affiliate and I don’t get anything from letting you know about this product! Our total investment for our Freeze Dryer was about $5,100.00. Grateful that the mylar bag sealer (Impulse sealer, $129.00 value,) comes with the Harvest Right Freeze Dryer.

https://www.amazon.com/Freeze-Drying-Log-Book-Maintenance/dp/B0B72ZSBRL/ref=sr_1_2?crid=3LZDXQVSSHNO6&keywords=freeze+drying+log+book&qid=1690550507&sprefix=freeze+drying+log+book%2Caps%2C160&sr=8-2

Freeze drying is a huge commitment and expensive. You do need a designated power source, we use the outlet we put in for our Rpod a couple years ago. She is in storage most of the time and so it works perfectly for us. Honestly, Mike is asleep or I would ask him if we have a 30 or 50 amp outlet. You will also need a place to put your freeze dryer. Ours is in the garage on a small table we used for camping - heavy duty - as it needs to support the heaviness of our dryer. You will also need a 5 gallon bucket for the drainage tube to empty the water into.

While the investment, at first was huge, the benefit out weights the cost. We literally do not waste food or drink anymore. Leftovers are DELICIOUS, full of flavor and reconstitute quickly as does any food we choose to freeze dry. I highly recommend Harvest Right company as everything you need or every question you have is answered on their website with a click of a button. Again, no affiliate but here is the website if interested:

https://harvestright.com

The Bees

I’ve gotten a lot of questions about the bees and how they are doing. The colony is doing GREAT! They are happy bees. We watch the new babies practice their flying, getting familiar with their surroundings each afternoon around 3:30 or 4:00. They do a lot of figure 8’s, take off and landings. They are super sweet and gentle.

The colony, if you remember, started out 10,000 strong. Now the colony has grown to be over 60,000 bees. They are stocking their pollen, nectar and honey for the winter months in the original hive. Mike added a honey super in the last couple of months as they needed more space. We will see if we get any ‘extra’ honey this year. Next year? Oh yeah, there will be honey for us, about 4-5 gallons, but this year? We won’t know for awhile.

All our original bees except for the queen have passed by now with new babies being born almost daily. Did you know that a honey bee emerging from their cell is fully grown? I had no idea! I kept looking for tiny honey bees. NOPE! Fully grown ladies and drones. No wonder they get to work immediately. Such a fascinating gift found in Nature.

Our chicken Flock

In early July we lost one of our ladies. Sissy Spacechick passed without warning. We are pretty sure that she passed during the hot days with the weather reaching the high 90’s. We were out of town at my ex-husbands celebration of life and our chicken sitter found her. She is buried deep underground in our front yard, returning to the earth and fertilizing the ground.

Chickens have a hard time with the heat. If there water gets warm they won’t drink it. We think the heat got to her. She was our tiniest pullet and she struggled a bit to get her footing to thrive. We now have 7 ladies who give us 7 eggs a day.

The girls are spoiled like no other flock that we know of. Not that people don’t spoil their flocks but ours have us wrapped around their little dirt scratching feet. Their food is organic and clean. We add a variety of herbs and dried flowers to their feed so that they get all the health protection possible.

They have 5 waterers that are available to them with each containing probiotics, apple cider vinegar and during summer days, ice cubes. I also cut up into tiny pieces, the ends to our zucchinis as treats mixed with calcium to prevent worms, mites, as well as any other yucky thing that might happen to them. I also grind our dehydrated lemon peel, orange peel and lime peels to spread in their dust baths to keep all the bad bugs away as well.

The Garden:

3 words: ‘OUT OF CONTROL’ as per usual! So far we have had an abundance of zucchini (40 off one plant,) green beans, garlic, scallions, bell peppers, jalapeños, blueberries, currents, eggplant, celery, rosemary, oregano, chamomile, basil, cilantro, thyme, sage, mushrooms, raspberries, parsley and as of yesterday, 30# 4.6 oz of potatoes. Red, Purple, Russets and Yukon Golds. . . yummy! We will be using this harvest for processing hashbrowns, cubed potatoes for soups and stews and rounds for scallop potatoes dishes. Some will become potato chips but I need to be another air fryer for that. The first air dryer went out the door with my third child when they moved back out after the pandemic.

Life on the modern day homestead is a lot of work but it is so worth it! We’ve managed to get in a couple camping trips with friends or family with the help of some very kind animal and house sitters who reep the benefits of eggs, produce and/or herbs. We are grateful for all our ‘happenings,’ never taking any of it for granted.

Those are our happenings. We should be doing much more such as paying attention to our yard or working harder on getting the pool balanced but we have a sick pup and that is taking up a bit of time. No complaints. The above falls into the should be happening and is not happening quickly.

I’m not sure I covered all the questions you had for me, but I gave it my best shot! Let me know if you have any other questions or shares by either putting them in the comments below or PM-ing me on my Facebook page. I’m happy to help!

Love, Light and Peace to you all!

Homestead Happenings

I took a break from the blog in order to help two of our four children move back out after being stuck here during the pandemic. What a nightmare that must have been for them to each have soaring careers, one traveling for his and one a content creator. “THE RONA” hit and they were stuck for very different reasons.

One son, took a ‘quick’ break from traveling to get all his work produced, polished and up for sale, but had no homebase to work from so we opened our home to him for what we all thought was a couple weeks.  The other son, our youngest, was renting a home and the landlord passed suddenly.  family needed to do some renno work on the house and so he needed to move quickly.  He, too, put his stuff in storage and came to stay with us ‘short term.’ We had no idea we were going to be all together for 3 years.  We made it work and it was actually really fun being stuck together!  Life just worked and to be honest, they are really cool, hilarious and helpful adults so it was a treasured experience.

Riley (above) looking for the boys and his sister (my son’s pup.) He’s sitting on furniture that has gone away.

Fast forward to this past 4-5 weeks, they have both found the most beautiful spaces in which to excel and get back to their own lives.  We couldn’t be happier for them! Mike and I are now unpacking items long spent in our own storage units, (there are four,) and moving out anything that no longer makes us happy, or serves our greater good.  Items that held negative energy are no longer welcome in our home nor our storage. We’ve made changes too, from lighting to furniture, to literally creating breathable space, a first in 8 years of lending space in our home to our other children as well.

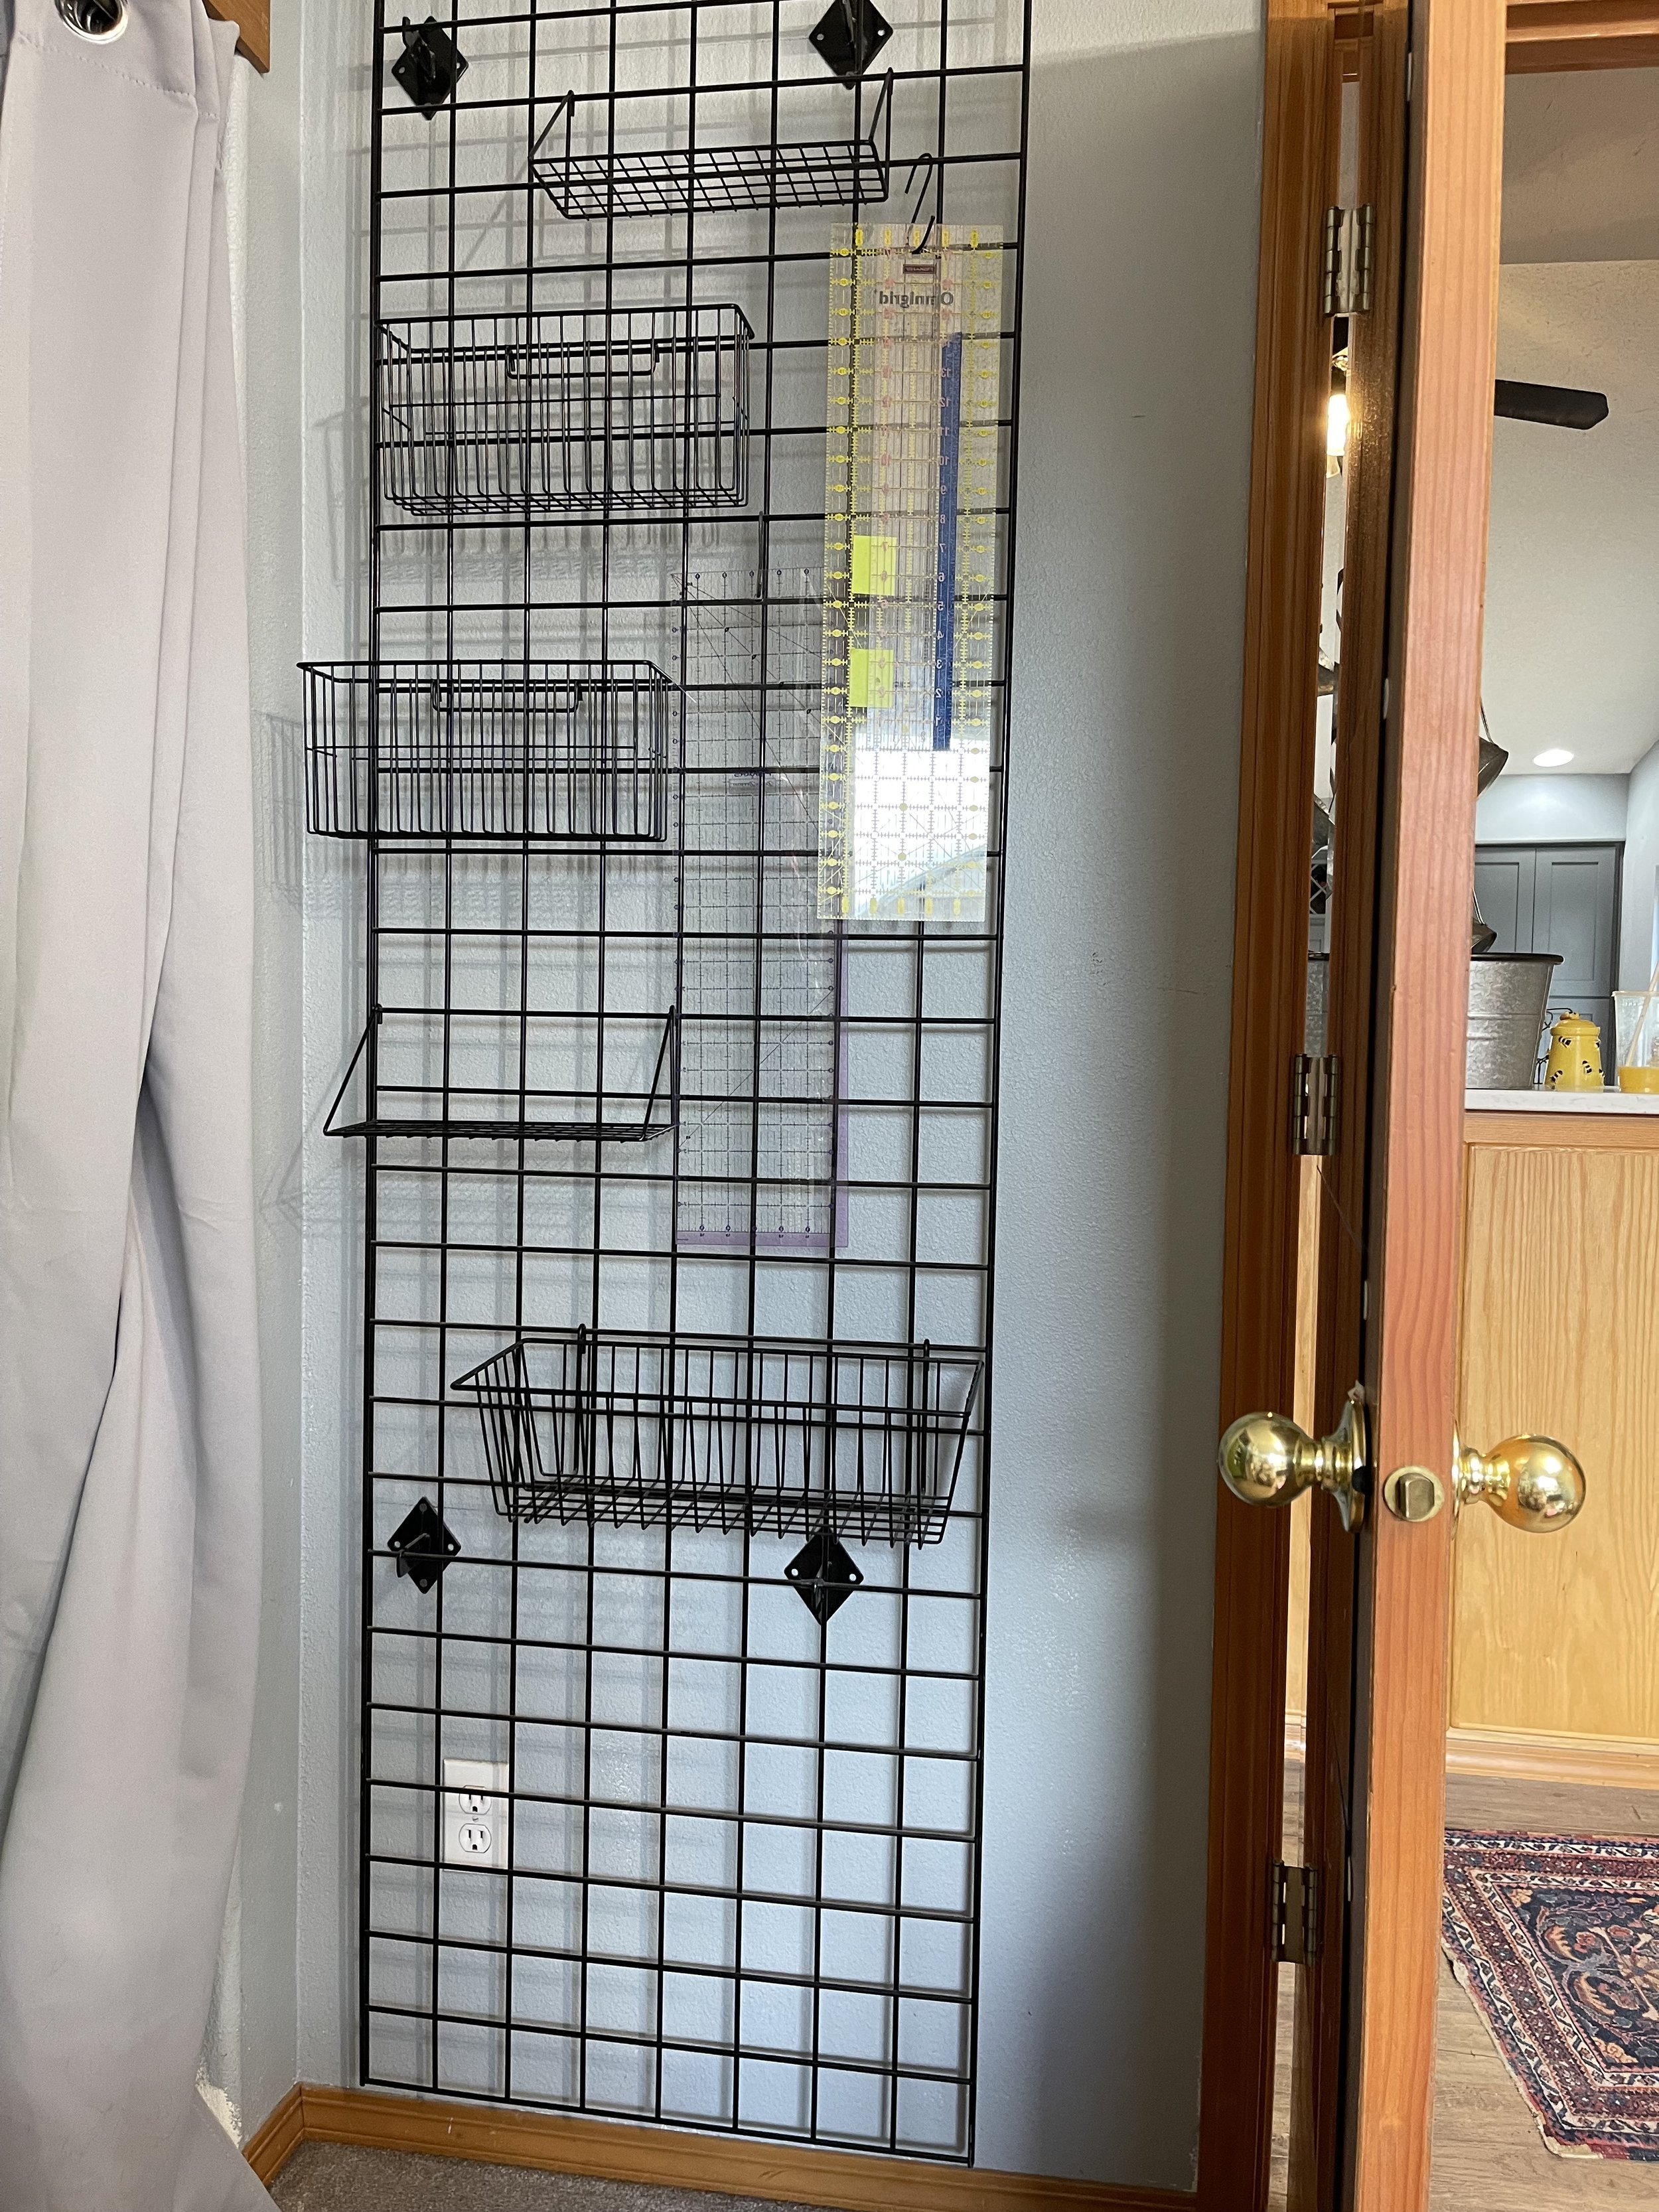
Below are random pics of a couple home improvements. There are a zillion more:

We’ve had several family members pass in the last 3 years and it seems, (not complaining) we always end up being the holding tank for ‘things’ that were either emotionally grabbed, inherited or given. While grateful, some of those items need to be remove from our possession so we can breathe. Also, bottomline is we no longer want to pay almost a thousand dollars a month in storage for items we will NEVER use and will NEVER come out of those units. We still need ONE 10’ x 10’ storage unit for Christmas, Halloween and Easter Decorations but even that will eventually get dwindled down. As of this writing, we still decoration vomit all over our home each holiday.

So what have we been doing (besides the above?)  We’ve literally been moving back into our home.  It’s been a process since our Modern Homestead doesn’t get put on hold while we work on the inside. There are animals to feed, we are awaiting the arrival of our bees colonies so there is all the prep for that, there’s a garden to clean up and replant and a 3 major builds to do out back.  Mike is putting in a shed to keep his bee equipment and supplies inside, the chicken play area is still not built because we “had time” to build it before the girls grew bigger. They ARE ‘bigger’ now!  Mike is also building a wooden set of stairs to the pool and a small deck to go with it. Our task list is NEVER done around here. 

I am learning to trust that I can be independent once more, now that I am feeling awesome again. Trust is a huge thing when it comes to being a cancer survivor - even thought the cancer was contained and specific to the area, slow growing, blah, blah, blah, it’s hard to trust your own ‘feel good’ energy again. I would say, I am 89% there and becoming more steadfast everyday. I was happy to hear at my oncology recheck that to be fully healing from the surgery takes about a year to gain total energy back. . . I want it now so I am working extra hard at working through my triggers! Mike has been amazing as per usual, encouraging me and cheering me on.

Each day, we try to do a little outside farm stuff and inside house stuff.  We make our own dirt and compost but we have run short so today we need to get some more dirt and we will add our chicken’s droppings to the mix for a ready good combo for the plants. Those girls not only give us eggs but they give us GREAT fertilizer! We will also combine those to things with the mulch we just made.  My man gave me a mulcher for my birthday and I could not have been more excited to get that baby running!

After Mike assembled it, we took it outside to do our first batch and what a comedy of crazy!  We put all the plant parts that didn’t decompose over the winter into the composter and I got to flip the switch.  I was so excited!  I flipped the big red switch and it whirled as super speed to chop that stuff up. What I didn’t think about is needing some sort of ‘lid’ to hold over the opening as there was a lot of debris flying through the air, getting stuck in my hair and all over my clothes. WHAT A CRACK UP!  Lesson learned and I will be grabbing one of the galvanized can lids to put over the top at next use! I also recommend, protective eyewear and a hat!

To show you which one I got, no affiliate, just information.  You can find it by copying and pasting this into your browser.

https://www.amazon.com/Worx-Amp-Electric-Leaf-Mulcher/dp/B002MAPZYC/ref=sr_1_3?crid=KQ7ZMQULCXO2&keywords=mulcher&qid=1682605413&sprefix=mulcher%2Caps%2C179&sr=8-3&ufe=app_do%3Aamzn1.fos.18630bbb-fcbb-42f8-9767-857e17e03685&th=1

Another gift I got was a Hori Hori Knife which was recommended to me by a friend and I recommend it to EVERYONE else!  It’s an incredible tool for gardening. It’s razor sharp on both edges - one serrated, sort of a trowel, thinner with a razor sharp point on the end. It’s about the same size as a trowel, in fact. Wooden handle, leather sheath with a strap to attach to your work belt if you so choose.  The Hori Hori Knife cuts through anything and everything, goes deep into the soil and is, quite frankly, slicker than snot to use!  Copy and paste this link if you are interested in one.  Again, they are not an affiliate so I get no credit for it.  It’s strictly for your information. For the life of me I do not know why the following link copy and pasted as a ‘click.’ Oh well.

https://www.amazon.com/Nisaku-NJP650-Hori-Hori-Authentic-Stainless/dp/B0007WFG2I/ref=sr_1_4?crid=1LHFMU8JVGSJU&keywords=hori+hori+garden+knife&qid=1682605708&s=lawn-garden&sprefix=hori+hori+garden+knife%2Clawngarden%2C188&sr=1-4

Back to what we have going on at the Miller/Chadburn Backyard Farm. Life has been crazy busy!  Sprinkling in time to work with Mom, setting up the house, getting out from under not only storage at a specific place but also literally living in storage within our walls at home.  I’m loving being reacquainted with my beautiful rainbow of fabrics for quilting, my painting supplies, my clay and tools, literally my creative art life.  I’ve done some creative projects over the last few years but my workspace consisted of two TV trays.  Now, I have my whole room back and I can’t wait to show the completed space to you all!

Again, random pics of the beginning stages and what you see here is AFTER I’ve gone through stuff and thinned out. So much more fabric to go through as well as art supplies. OY! I’ve got the “too much” gene.

I am realizing as I place some of my fabrics on the shelves that I have so many quilts started but not put together. Ready to get put together but didn’t realize what I had to put on hold the last 8-10 years for one family emergency or another. It kind of started when my ex chose to walk away from our marriage of 26 years and then my bonus Mom got sick and I cared for her almost daily eventually passing, which snowballed into care of my very lonely dad, covid and my own illness (just to list a few things.)

I think at last count there are 8-10 unfinished projects to finish before starting anymore quilts. I also have three quilts sewn and finished to the point of needing binding. Cheese and Crackers I’m going to be busy finishing all these art pieces! I’ll take a couple of them camping in 3 weeks and bind while there. My Challenge is this: Being patient enough to get the room together before starting any of these or the numerous other projects I have in my head. I’m itching to start. It’s funny, when you have the room to think and create, the brain and heart start to get excited and it’s hard to wait!

Mike has helped me install shelving, move furniture and has even given me the “okay” to paint a beautifully crafted bookshelf he created in high school. It will be white so it can match the rest of the furniture in the room. He’s a very generous man, and I know how hard that was for him to let me do that. It’s a wonderful piece of art and I am grateful he is letting me paint this treasure.  He wrote messages and dated the bottom of the shelf so maybe he will let me date and write a message to him on the bottom of it as well. It’s a pretty sweet and funny message to himself.   I just love and REALLY like this man and his heart.

This is where I will leave you.  Gardening is top priority as that is our food for the upcoming winter.  Building projects will be ongoing and the inside will be close to being done, hopefully by our first camping/crabbing trip mid-May. We love this life as we see it not as ‘work,’ but as pure joy.  We give to the earth, the earth give to us. Tranquil living, grateful living, sustainability being key.  It is us. 

Wishing you a chance to find your bliss.

Love, Light and Peace, Always. 

Introduction and integration: Chickens old and new

Integration of the 15 week old Pullets

What a significant day!  Not only for the arrival of the future egg layers but the date itself.  I have 3 children born on the 16th of different months and one born on the 6th but only because he chose to arrive early.  I’m not surprised that this date is was meant to be when adding more life to our family.

Adding 15 week old Pullets to our flock may sound easy but it’s not.  They will arrive by USPS this morning, we will unbox them and make sure they all have water immediately.  Food will be second and the food will be crucial to keeping them healthy enough, developing correctly to become pro egg layers in a few short weeks. It’s a lot of hands on work and it will take both of us to make it work since Mike will be building their new play area at the same time.

The importance of water:

Clean water is imperative to keep your chickens healthy.  Daily water checks are a must. Plain water is good BUT fortified water is healthier and a great way to protect your fur babies by boosting their immune systems with Apple Cider Vinegar which also helps to prevent lice, worms, mites and even balances their PH!  We also put in probiotics and a dash of oregano. Oregano is a natural antimicrobial/antibacterial ingredient.  When fed to chickens, it also boosts the immune system while helping to ward off salmonellae, Avian Flu, even infectious bronchitis. When the oregano grows in the garden, I just throw some into the coop.  When it’s not, we substitute oregano oil or dried.  We refresh these fortifiers every time the water is changed. Please make sure your waterers are clean with any dirt in the outside drinking trough swished out daily. New water should be made a couple times a week, your babies will love you!

The importance of Proper Feed and Schedule: 

Today we need to have a mixture of 20% layer feed and 80% starter feed. This feed is what is necessary when raising chicken from birth. Crumble NOT pellets is VERY important as they have a hard time eating and digesting pellets.  We will feed the flock this mixture of food for one week.  It’s important to know that this feed mixture can be eaten by Turtle with no problems what-so-ever.  HOWEVER, chicken’s under the age of 18 weeks CAN NOT eat Turtles full layer feed yet. We use unmedicated starter and layer crumble. Non-GMO.

Layer feed for young Pullets can cause damage to their reproductive organs as well a cause kidney damage.  We don’t want that. We want super healthy, strong egg laying hens so we slowly feed them in progressive steps. You flock needs to have access to food and water at all times, so if they aren’t free ranging, make sure the waterers are full as is the feeders.

This is what the food transition will look like using feed that is crumble:

Week 1: 20% layer feed/80% starter feed no treats, scratch, grit or oyster shells Week 2: 40% layer feed/60% starter feed no treats, scratch, grit or oyster shells Week 3: 60% layer feed/40% starter feed no treats, scratch, grit or oyster shells Week 4: 80% layer feed/20% starter feed no treats, scratch, grit but oyster shells okay in a        separate container placed away from food. Week 5: 100% layer feed with access to oyster shells in a separate container, located away from their main food source.  The now 19-20 week old Pullets find the oyster shells and eat them as needed.      

RECOMMENDED ‘Do Not’s’

Please, please, please, if you feed your chickens pellets, grind them up or reconsider your choice of food.  Pellets make digestion difficult. Feeding your flock crumble will eliminate the need for grit as they will be able to digest their food easily. 

PLEASE DON’T feed your babies SCRATCH as their main source of food for these reasons:

  1. Decreases egg production 

  2. Causes a protein deficiency

  3. Encourages selective eating - they can see all the grains and pick and choose what they eat causing #2.

  4. Chickens become deficient in essential vitamins and minerals which equals fewer eggs.

  5. With these imbalances comes health issues that the goodness in the water will not prevent. 

  6. You don’t want to end up with FREELOADING chickens, do you???

Introducing and Integrations of the old and new flock:

Slow and steady is really going to be key.  We don’t want Turtle to get traumatized in the introduction process as this has been their personal living space since this past summer when Peep Peep passed. 

They will have to spent some time in the space below the nesting coop.  The area is closed in, yet has room to road, play and watch the new flock discover and explore. 3 of the new ones look exactly like her so that will help the transition A LOT.  4 are lighter in color but body wise are exactly like Rhode Island Reds.  They are Buff Orpington’s.  Once the new flock is watered and fed, we will get Turtle out to see how they react to the newbies. Turtle is spoiled rotten so this will be interesting.  Our savings grace may be that Turtle adores Mike so he will do the handling of her as I introduce each newbie to her. Wish us luck!

We just received the phone call that the ladies have arrived at the post office so we are off and running!  If you have any questions about chickens, raising them, etc, please let me know in the comment section below. This is our 6th year as backyard farmers who had little knowledge of what we were doing in the beginning!  We are happy to share our knowledge about chickens, their needed environment, safety and equipment needed for a healthy flock. 

UPDATE ON INTRODUCTIONS AND INTEGRATION:

Picked up the ladies and they were happy to be out of their travel boxes. The Heritage farm shipped the girls perfectly and with love. They had apples to keep them hydrated and fed during their trip from Montana and they had shavings underneath them to be comfortable. The boxes were also tall enough for them to stretch their legs if need be.

We got them home and introduced them into the main aviary to meet Turtle who was in a pen under their laying quarters. They were curious about each other as we unpacked them one at a time. Cooing and chattering began through the chicken wire with Turtle clearly wanting out from “behind bars.”

We had one little escapee who flew directly out of the box and straight out the main door to her short lived freedom. She loved spreading her wings and just exploring with Mike close behind. He gently retrieved the little darling and returned her to the safety of the aviary to get her bearings and land legs.

Turtle has shown her dominance a few times but nothing more than saying, “My space, My rules.” All but two littles are willing to just let T do her thing and not make waves. NONE are scared of her. The two littles that stand up for themselves are clearly strong warrior women. I mean ‘Chicks.’ The Rhode Island Red shall be named Lady Peck Peck and the Blond Buff Orpington shall be named Emma Thompshen.

As the day carries on, the littles and Turtle have switched places for a bit. Mike needs to begin their play area so separating them is necessary. I’m finishing this blog and heading back out there to pick names for the rest of the babies. Here’s to a magical day, y’all!!

Love, Light and Peace

Part Four: An Awakening- ANTWAB conclusion

Aside from having a backyard rural farm and all the crazy that goes with it, being responsible for the survival of one or two Italian Honey Bee colonies puts even more pressure on us to be a thriving self sustaining garden community of good food and medicinal plants. Making sure the bees have all that they need for survival is just as important as making sure the garden plants and trees thrive as well. We are up for the challenge and look forward to this exciting part of our journey.

As we found out yesterday morning, our animal and personal food supply as well as equipment are in jeopardy due to a “rat bastard,” who has helped themselves to a ‘chew’ fest. Luckily none of the bee hives were damaged by the terror of a beast whom I liken to being the size of a Great Dane or a large Kangaroo. The damage is vast and costly but we are on top of it! As of this morning, the only thing new that has been whittle down with teeth is the treat I made for them two nights ago. Even though the ‘Salted’ treats are harmless anything but a rodent, we have placed it where we know the rat feasted most. We’ve also purchased 5 animatronic owls that are motion activated with sound in a 20 foot radius. Those will go around the yard in every direction. Will see if they work as well!

Our bees are set to arrive anytime between mid-April to the 1st week in May. We are getting them from an established colony located on a local farm at least 20 miles away. As I’ve mentioned before, Mike is also hoping for a wild swarm capture. We have purchased Italian Honey Bees for our first colony. It will be small in size but with start up help, the colony should establish itself inside the hive quite quickly and begin to grown. Italian Honey Bees are gentle in manner and good honey producers. Chances of getting a lot of honey this summer are slim but we will get some. Next year the colony should be strong enough to produce 3.5 to 4.5 gallons of honey. I hope so as I want to share with others as well as keep what we need too!

In the meantime, Mike is gathering all of the supplies and equipment from the attic to clean, making sure it is in good working order. He’s checking out both smokers, the Honey Extractor, his two complete bee suits plus every other piece of equipment and tool needed to raise bees in the best way possible. The hives are in perfect condition as are the feeders so he is well ahead of the game. By keeping all of what is needed to raise and keep bees, he has saved thousands of dollars in start up costs.

He’s had to a few items that had not fared well over the years but not many. He updated his bee suit, hat, netting and gloves but kept the first one of each as a backup. He’s spent about $1000 to upgrade and replace but if he were to start it now for the first time, the start up cost would be upwards of 5K. You can go a cheaper route but it’s still going to cost you a couple grand and not be as safe for the bees. Just something to think about when starting up beekeeping. Mike is a good resource/guide if you are thinking about having a hive and working with bees.

Mike is pumped for this adventure! It’s our “go to” conversation from sunrise to sunset, quite often chat sessions in between and late into the evening. It’s his passion. He LOVES his bees. He loves every part of taking care of his hives from their little inhabitants to gently acquiring their honey to making sure they have enough food for themselves during the winter. The BEES and their survival is his top priority. Mike even bought hive blankets or ‘wraps’ to keep the cold out of any unrepaired crack the bees may have missed in the hive. You think our chickens are spoiled and pampered? Just wait. . .

If you are at all interested in raising bees yourself but don’t know where to begin or if it’s for you, let us know in the comments below and Mike would be happy to answer your inquiries and guide you. For all questions about medicinal uses and benefits, direct them to me. Until the next blog, happy bee watching!

Love, Light and Peace


PART THREE: An Awakening - A Need To Walk Amongst The Bees

This third installment of our bee series is all about the Hive. The gathering place that is self sustaining for the duration of their lives. The inhabited space is literally a multi level castle and the each level is pretty much perfection when it comes to construction and production. Below are our two Hives we will be working with. . . er, Mike will be working with.

The tall hive holds, temporarily, the levels that will go on the lower Hive when needed. The shorter hive is the ‘working’ hive and will house the first Italian Honey Bee Colony in the Spring. If a second Hive be acquired, The seconds above the brood box will be removed until they are needed. Confused? I was.

There are perimeters that have to be met before you can even place a beehive in one’s yard. In the city, you have to have the boxes 25’ away from your property line or you have to have a 6 foot barrier between each property. Check with your individual cities for set rules if you are planning to do this. Our city requires the above perimeters, Porland, Oregon, on the other hand only requires bees be kept 6 feet from the property line. We can only have 5 hives before we need a permit to beekeep, same thing in Portland.

Where we live, for the square footage of our property, we can have 3 hives permanently, but we can add one more during swarming season. Mike is looking into what you need to do with the fourth colony because in his research that is not listed. HOWEVER, Mike did say that the fourth colony can be incorporated into an existing colony if you are willing to kill both queens so there would be less likely to fight. Make sure there is a honeycomb that has queen cells in it BEFORE incorporating the hives. so all the young bees will raise the new queen and everyone will be back to worshiping her, carrying on with life with a stronger community.

The rules for Portland are different. First you have to send out a letter to your neighbors to tell them you are getting bees prior to installing hives.. Second, you can have up to 5 colonies on any sized lot BUT if you have 10,000 square feet or more, you can have or more 6 and no permit required. So, PLEASE check out what your requirements are where you live! SIDE NOTE:
PORTLAND! Mike just told me you can have livestock in your backyard. Do you know how jealous I am???? You just have to keep it really clean so it doesn’t start to smell. But WHAT?! I am so very jealy right now! If you are thinking about that, check out your regulations first!

The whole bee hive is a ton of information to keep writing about so Mike and I sat down to have a chat about the parts of the hive in his own words and to talk about his experiences with nurturing bees. Below is two excerpts from our recorded conversation. If you have any questions, please ask them in comment section below or leave a comment if you want and give it a like too!


An Awakening - A Need To Walk Amongst The Bees

I know from my own breathtaking experiences with being invited into the center of a bee swarm, unprotected, that the world in which I stood was like no world I had ever been apart of. It was peaceful, loving, deeply wise and to a blind eye, silly. There was no fear of being stung, no disruption to their mission and a shared respect for each other as I stood in my front yard under our Vine Maple tree.

I was with my life partner, a man named Mike, when my last experience occurred while Mike was away at work. Swarming season, I have come to learn, is early April to very early May and this swarm had perfect timing. The Queen must have been in our Vine Maple Tree and the hive had followed her. . . or so I thought. Yet I stood amongst the unaggressive bees as they walked around or over my feet, landing and taking off from my unprotected skin and hair. Their curiosity met, they headed toward a large tree branch high overhead. It was mesmerizing, hypnotic even. I could not wait to tell Mike when he had a break at work.

As soon as he was able to chat, I shared my experience, he shared stories. I didn’t ask a lot of questions but I did learn they swarm without the queen. Over the last 3 years, we’ve spoke about bees every now and again, usually the same information to my same asked questions and had some quick learning in there two when we spotted a honey bee now and again. I don’t remember the exact moment a deeper conversation about honey bees became more important to both Mike and I but I know it was sometime last spring. In a world where chemicals and genetically modified foods are prevalent, growing our own food and sustainability is important to us. Clean organic growing, harvesting and eat is a priority.

One day, Mike and I were talking about his beekeeping days and I told him I would like to invite a colony to live in our garden. He assured me that when he was out in the country it made sense to have a couple of hives but here “in town” was not an idea we should probably entertain. My first thought was “wait. . . what. . . why????” He made some great points about not wanting to cause problems for the neighbors, etc so I didn’t push it further. I knew that our garden full of veggies, herbs, spices and fruit was enough to bring in the bees from the surrounding farms to be fertilized but I also knew that all of our neighbors grow large gardens so bees would be a benefit. . . still I just let the idea ride.

Fast forward to January 2023 when we take a trip to our favorite safe space in beautiful Central Oregon. We always take a week during the beginning of the year to plan our goals for the year. Most of our goals were discussions about home repairs needed if any, our backyard farm improvements such as better companion planting, improving a couple of spaces that are in old planter boxes that are falling apart and in need of replacing. Pretty much our immediate goals were minimal at best. We give ourselves 6 spaces for immediate needs. 3 usually are longer term immediate needs.

We each pick a need to put on the list and one that is mutually agreed upon to add to our list. We also shared why we had said need to add the item and its importance. Our mutual need was an increase in our flock of chickens from 1 to 8. We need the eggs since we have one chicken who is freeloading, we need eggs and enough to share with others. We agreed is was important addition to our backyard farm as it will benefit us and others. I shared us needing the addition of a Freeze Dryer as another way to preserve our meals, fruits, veggies and other deliciousnesses. We’ve researched and discussed the possibility of getting one for 2 years now and after last years harvests, it’s needed. Mike’s need was to add two colonies of bees to our backyard farm for many,MANY reasons that covered both use nutritionally and medicinally, not to mention the help to save them bees from extinction. He agreed that the neighbors will benefit as well. He stated that the legalities have been researched, we are fully equipped, which I did not know, and we are good to start this spring.

I had not known that Mike had been doing research on the legalities for months. I didn’t not even begin to know his vast knowledge of bees, nurturing them and raising them so they thrive and change our lives in ways I had never even thought about. He hadn’t been reading up on bees. He hadn’t been googling what to do or how to do. it He KNOWS. He is an expert who never really dove into the nitty gritty of working with these gorgeous givers of life. He learned by doing. He learned by experiences as well as some book knowledge. As he spoke he was suddenly, I realized, a walking Encyclopedia or Wikipedia of deep knowledge on everything honey bee. Incredible information about bees in general and all gain information combined together with years and years of experience. I was blown away and excited that Bees were on our ‘immediate’ list and they were going to be nurtured by such an incredible human.

Mike started to share his experiences with me in a manner I had never heard from him before. He was so joyful, passionate while using his words that flowed easily with information as fluid as a gently flowing stream. Beautiful, interesting, captivating. I suddenly yelled “STOP! I mean, WAIT! I mean, can I interview you for my blog???” This usually shy man said “Yes.”

I had heard people speak about bees and beekeeping before but, they were monotoned, not emotion. Quite frankly it was like listening to a book being read that had a pointless plot. They may have enjoyed bees but they did not embody that passion. Mike passion for bees was oozing from him as he sat chatting across the coffee table from me. Mike was awakening his need to be with his bees again and I was being presented another opportunity to walk amongst them. How cool is that?!

I have to say that I thought bees were only important for pollination. I thought they were hatched and flew out immediately filling their little selves with pollen, nectar, taking it back to a hive somewhere, making a deposit and repeating it all until there was a comb full of golden honey one could put in a jar. Oh boy have I gotten an education about bees, types of bees, it’s job and it’s life cycle. It’s exciting!! Part one of this blog has turned into the background of becoming a true keeper of bees. Welcome to Part One of my interview with an quiet Expert BeeKeeper, named Mike.

Mike lived on a farm in an old ramshackled farmhouse in Independence, Oregon for 14 years. The home was built on stilts because the Willamette River sometimes flooded during the rainy season and the acres of surrounding farmland became part of said river. During those times Mike said he would use his inflatable raft to get around the property as it was an opportunity to have fun. His years there brought many opportunities to learn and grow his knowledge about farming, including beekeeping which quickly became a passion.

Mike’s first empty hive was found under his home, left by the previous inhabitant. To him it was like getting an unexpected Christmas gift of sorts. He had never come across an empty brood box or even touched one before but here it was, already igniting a spark in Mike’s soul. Off he went to the Brook’s Farm Store actually looking for a food dehydrator but curiously look if they had any Bee Raising information. He got the dehydrator -which still works - but he also left the store with a couple books about bees and a catalog of beekeeping equipment to purchase needs. He was ready! He had an empty hive and a smoker to begin with. No veil, no gloves, nothing but he was ready to start his bee adventure.

His first colony was found in an old pumphouse. He knew they were honey bees because he could see them darting in and out of the structure, but he had no idea what kind of honey bee they were. Didn’t much care either. Fascinated by the activity in the roofless, useless old pumphouse, he decided that he would name this hive THE SIX HOUR PUMPHOUSE HIVE.” It took him 6 hours to get the bees out of there and into the new hive. 1987 was the year of his first ‘capture,’ and still ill-equipped to properly move the bees, Mike wore a ‘protective’ suit that consisted of socks and boots on his feet, blue jeans, a thick down coat while over his head he wore a white cannery hat with a window screen kept together with a large rubber band. His coat collar covered the screen at the neckline. His gloves he wore an old pair of leather wood stacking pair. I wish I had a picture!

Armed with his smoker and the empty brood box (hive) he, without knowledge of what he was doing, used the smoker to slowly remove the pumphouse bees. He removed the siding of the structure using a crowbar, then smoking the bees, calming them. He then would cut sections of honeycomb with a knife, placing each cut section in the frames tying the pieces to the frame with twine. Smoking the bees made them easy to remove but as soon as the smoke dissipated, the bees flew out of the new hive and returned to the pumphouse where deep inside was their queen. Eventually, with in the 6 hours, Mike somehow unknowingly found the queen and brushed her inside the new hive because the rest of the hive followed her into their new home and stayed.

Over the next several days, Mike was only able to move the new hive 3 feet per day toward his home, about 100 yards. This is done so the colony could learn to trust that this new hive was their new home. According to Mike, you can either move the colony’s new hive 3 feet per day from their old space or 3 miles at one time. The distance is important as the bees need to remember where the new home is which helps them adjust to their new surroundings that isn’t far away. If you have to move them far from where you captured them, it needs to be 3 miles or further, so they can adjust right away without the distraction of their old home.

Over the years Mike built, raised, nurtured and loved 14 colonies of productive bees. They were all captured wild colonies or swarms. He found them in trees, a barn, in the ceiling of an abandoned hop dryer, (his most dangerous adventure,) and other long forgotten farm buildings. His colonies were strong and his knowledge of caring for these beautiful creatures grew as well. He made sure they were safe and healthy throughout all seasons.

Mike shared a story of one dark early morning, when there was a knock on door with the farmer warning him of the crop dusting to be done when the sun came up. The farmer offered another safer field to take his bees to for awhile. Out the door Mike went putting his hives into the back of his pickup truck for the move 3 miles away. Successful in his move of the hives, they stayed in their new spot until he got the “All Clear,” to move the hives home.

To end part one of this beekeeping adventure, I would like to share this: From a very young age, Mike had a connection to the bees he gingerly played with in the grass of his home. He allowed them to crawl on him, fly around him and when they landed, he had conversations with them, assuring the bees they were safe. When he found that empty beehive under his home in the country as an adult, those memories rushed back to him and he was compelled to share his life once again with the honey bee. The hive you will see in the picture below were patterned from the empty hive found under the house. Mike build 14 hives from scratch but saved only two from his adventures on the farm. Buying his new home was the priority so he cleaned his now 40 year old hives and equipment placing them up in his attic.

Mike has been bringing down from the attic treasure after treasure from his beekeeping days. The equipment is well preserved and in great shape including the sheets of what is called ‘foundation.’ In the next blog, he will be sharing with us more in depth information about the equipment and I’m sure, more stories. With beekeeping becoming an expensive ‘hobby,’ we are fortunate to need nothing for him to begin again. Two hives in tact, we will be using the well built and preserved boxes for two colonies. His hope is that we acquire the colonies during swarming season but in case we don’t, Mike reserved one in that will come from a local farm. The two hives we will use, Mike named for the colonies they once held and the locations they were found all those years ago. What are they named? The first hive is “THE SIX HOUR PUMPHOUSE” and the second, “THE KEEP OUT BUILDING” which is another story! I am beyond excited to share with you more of Mike’s stories and expertise getting into the nitty gritty of beekeeping/nurturing starting in the next blog on Monday!!!

In the meantime, please feel free to make comments or ask questions in the comment section below!

As Always, Love, Light and Peace.

Comfort and Joy. . . Food: Two saucepans and a bowl

With winter upon us, the air is getting colder and the days are fading to black much more quickly than they were last month. I don’t know about you but December 21st, the Winter Solstice can’t get here soon enough! The shortest day of the year is but a moment in time which gives way to longer days and shorter nights. Love it.

During these short days and long nights, we always seem to crave meals that take a little time but reward you with a home full of wafting smells that take you instantly of childhood gatherings at Grandma’s or Mom in the kitchen. Both of these women could turn a little food into a belly full of goodness that warmed you to your soul as it was chalked full of love.

Making Turkey Pot Pie with leftover poultry from Thanksgiving dinner is, for me, an tribute to both my Mom and my Grandmother. My mom could make a pie crust that was perfection. My grandmother was used to cooking for an army so her combination of meat or poultry, veggies and spices was scrumptious. Let me be clear, Grammy didn’t cook for an actual army. She’s cooked for 5 children, their spouses and 13 grandchildren almost every weekend. Many times her sisters, their children and their children’s children plus friends joined in the weekend festivities as well. Their little house was hub of good food, good conversations and good times.

What Mike and I did, was create a recipe for Turkey Pot Pie that was full of flavor with a pie crust that was perfection. Light and fluffy yet thick enough and strong enough to hold together when sliced into servings. This recipe is bringing our culinary memories to life. Since we did not have any guide to go by, we trial and erred it, documenting what we did through pictures and jotted notes. What makes ours unique is that we use both dehydrated veggies and fresh ones, plus many homemade ingredients. The versatility of this recipe is also unique in that all the ingredients are easily convert to Gluten Free/Dairy Free straight across the board without adding anything extra than what you see.

Listed next to each ingredient will be the original ingredient and the alternative. There is NO change in the measurement of said anything. Timing of baking is the same as is the oven temp. Start to finish! Easy Peasy! Let’s get cooking, shall we?

Equipment Needed: One large saucepan One small saucepan One wooden spoon One spatula One Whisk One large mixing bowl One pastry cutter - if you have one, a fork if you don’t. One Deep Dish Stone Baker from Pampered Chef which they don’t sell anymore. I say use what you have that works for you. Measuring cups Measuring spoons Dinner Fork Plastic wrap or parchment paper

Make the Pie Crust first because it has to be refrigerated for 45 minutes to an hour which is plenty of time to make your filling!

Ingredients for Pie Crust: Pretty basic but the way one mixes it is most important!! Flour or Gluten Free Baking Flour (We use Bob’s Red Mill but feel free to use your brand.) Crisco reg or butter. For Gluten Free I recommend you use Palm Oil as it is similar constancy to Crisco. Coconut Oil solidified is okay but you will get a different consistency and texture. If you choose to use Real Butter, cut it into small cubes and skip the salt. Salt - Totally optional as it’s a flavor enhancer. ICE COLD water.

DIRECTIONS FOR PIE CRUST:

In your large mixing bowl, place combine 4.5 cups of flour and 1 teaspoon of salt if you so choose to use salt. Give it a quick gentle mix using the Dinner Fork.

Add in 1 1/3 cups Crisco, cubed butter or alternative shortening. Use your pastry utensil to work the shortening or alternative into the flour until it looks like a crumbly bowl full of goodness.

Adding 2 Tablespoon of ICE COLD water at a time. After each 2 Tbs., mix the flour, salt, shortening combo gently with the fork. Repeat for the next 6 Tablespoons as you will notice the dough beginning to cling together.

As you gently work your dough into the final ball, add ICE COLD water 1 Tablespoon at a time until the dough can be gathered with your hands into a solid ball.

CUT the pie dough ball in half. Make two balls, flatten each ball into a thick round. Wrap in plastic wrap or parchment paper and refrigerate both for no less than 45 minutes.

I”m sorry for not posting pictures of this process but ‘someone’ had a brain fart and forgot to do so as she made this recipe. You can use any pie dough recipe you choose. This one is basic but the gentleness of how it’s mixed is key. I don’t know why, I just know it is. As always do your own thing. I prefer making it with my hands (I wear gloves,) because I can be more gentle than when using my KitchenAid but whatever way floats your boat, do it.

While your dough is resting in the fridge, make your pie filling! The Yummy Part! I don’t measure but will “best guess” it for you. Feel free to add different veggies or more veggies, meat if you want.

Ingredients and DIRECTIONS for making the filling:

In a LARGE SAUCEPAN Place the following ingredients. I like to place the dehydrated foods in first so they get the longest exposure to water to reconstitute.

2 cups (ish)Turkey (Chicken, Beef, Meat Alternative or Meatless - Vegan: Leave out meat.)You can use precooked or uncooked proteins. Cut up into cubes for easier cooking. 2-3 Garden grown (pictured) Carrots, sliced into coins OR 1 cup of dehydrated carrots OR 2 cups of frozen. 1/2 cup chopped Fresh Mushrooms OR 1/2 cup broken dehydrated mushroom pieces 1 cup Fresh Peas OR 1/3 cup of dehydrated peas, Frozen works in place of fresh too! 1-2 Celery Stalks sliced into smiles - 1/4 cup dehydrated celery stalk.

FILL THE SAUCEPAN WITH WATER JUST TO COVER ALL THE INGREDIENTS. (Last photo) Turn the burner to Medium Heat and bring it all to a boil. Once your saucepan is boiling, lower the heat but keep the boil going for 15 minutes. When 15 minutes is up, remove from heat, drain the water out, put the protein and veggies back in the saucepan and set it aside for later.

In the SMALLER SAUCEPAN add:

1/3 cup butter or a couple tablespoons of olive oil or 1/3 cup butter alternatives like Earth Balance and let it melt in the pan. Then ADD to the melting goodness: 1/4-1/3 cup chopped onion Fresh Garlic Cloves minced - We add at least 6 or 8 cloves. Add what you want or use Garlic Powder, that Jar Garlic stuff, just use garlic unless you are allergic then don’t. COOK these three ingredients until the onions are translucent - about 5+ minutes.

Once the Garlic and Onions have done their thing, it’s time to make the rue. Add into the small saucepan mixture: 1/3-ish cup of flour - WHISK IT TOGETHER WITH butter, onions and garlic. Let it cook for a minute or two to meld the flavors. During this short cooking time STIR in: 1/2 teaspoon salt 1/4 teaspoon pepper 1/2 teaspoon rosemary (optional) 1/2 teaspoon sage (optional) A sprinkle of Thyme (optional) BLEND TOGETHER AND ADD: 2 cups Bone Broth or Veggie Broth 2/3 cup Milk or Milk alternative. I find that Oat Milk reacts like 2% Milk. Do your own thing. COOK ON MEDIUM HEAT until the mixture begins to thicken like gravy. REMOVE FROM HEAT AND ADD TO LARGE SAUCEPAN INGREDIENTS. Gently mix to combine.

Take out the first pie crust and place it in the middle of your baking dish and hand press the dough to the outer edges of said baking dish. Once finished, poke air holes into the dough. (pictured below)

With the bottom dough in place. ADD THE large saucepan filling and spread evenly. Set it aside.

Using parchment paper instead of a floured surface (you don’t want a floured surface!) Take the second flattened ball of dough and hand press your pie dough into a large circle to cover the filling. Place it on top of said filling and cut slits into the top of the dough.

Place your pie on a cookie sheet to capture any overflow. Bake your pie in a preheated oven set to 425 degrees for approximately 30 minutes or until crust is golden brown and the inside is nice and bubbly. Might be a few more minute depending on where you live and what kind of oven you are using. Ours is gas. Electric might take 5-10 minutes longer.

Let your delectable pie cool for about 10-15 minutes before serving. Enjoy!!!

A creative mind

When my mind is in a creative mode, it makes for sleepless nights because it’s when I’m clearest in my thinking. Supplies are envisioned and nothing is safe from possibly being used that is found inside the walls of our home! I will recycling and upcycling whatever I need to bring a project to fruition. Thinking outside the box is common for me as every project has to have a story when completed and on display. Last night my mind decided to kick into overdrive at 1:30 am. The excitement in my mind was so loud that getting out of bed was the only option.

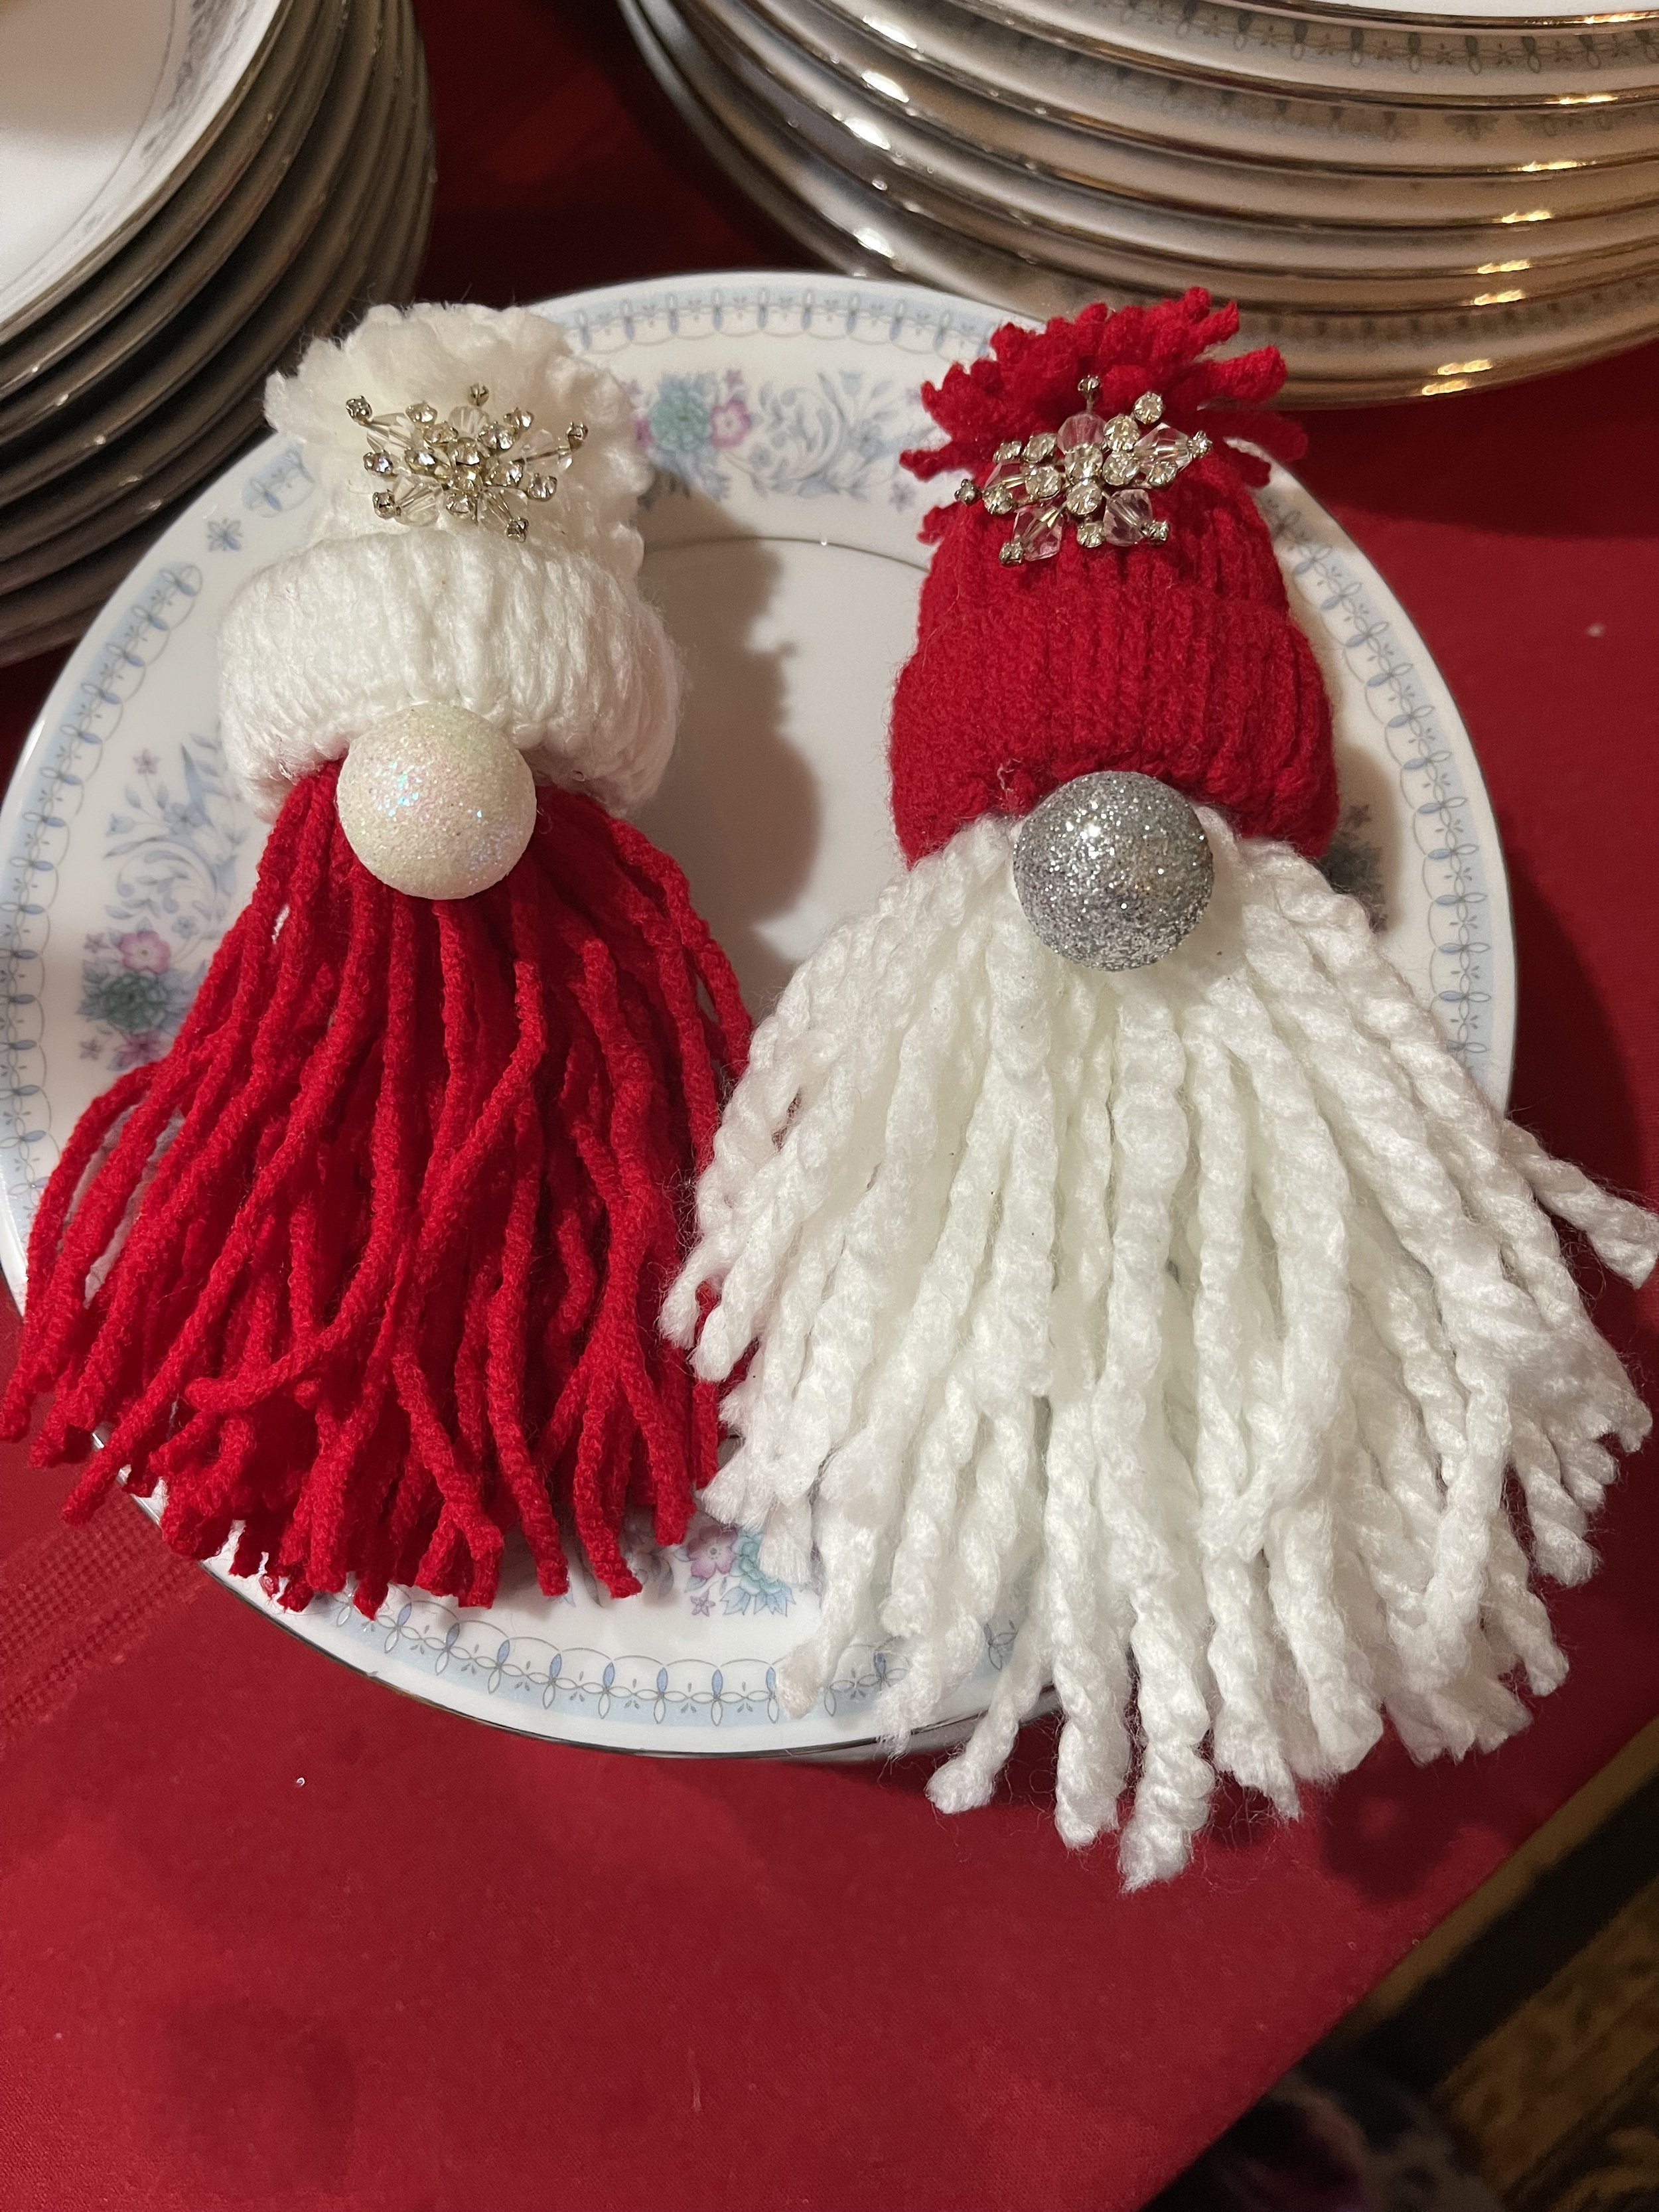
What had my mind going? Enhancing my Gnome village I had built a couple years ago by paying attention to the trees that surrounded it. Some of the trees stand four feet tall and held ornaments but none that matched the village theme. Earlier in the evening I remembered seeing cute little Gnome ornaments being made at some point in the past. I felt that little spark ignite and instead of staying lit until the morning, my brain kept feeding it fuel to burn brighter, bigger, longer. I had to figure out how to create a pattern. Some people are driven to knit a sock and I was determined to create a Gnome. I found a picture of a Gnome head online and figured it out from there.

I’ve created 14 Gnomes. Each one gets easier and more simple. I can now add variations to the hats, beards, embellishments. I think I have the main pattern down for you to start with. I encourage you to do your own touches. Don’t be afraid to be creative.

With the instructions, there are a correlating pictures for help with each step. Some have one photo, some steps have more as I wanted to be clear in the instructions. Once you make one or two Gnomes, you will be able to make them without the pattern. Let’s get started!

SUPPLIES:

Scissors
1 or 2 different colored Yarn
- Small, Medium or Large will work, depending on the size of your hat rim.
1 Empty Toilet Paper roll center or empty Paper Towel center -a toilet paper roll will make about 5 hat rims - depending on how wide you cut it.
- a paper towel roll will make 10-12 hat rims
- there are other options too. The larger the circle the larger the yarn is my rule of thumb. 1 rectangle of cardboard measuring 5” x 6” or not. See side note in step #8.
4 Cotton balls
or Small piece of batting/pillow stuffing. Chunky does NOT work.
Hot Glue Gun and Hot Glue - I’m sure you can use fabric glue but it takes to long to dry for me so I don’t use it for these kinds of projects.
Something lightweight for a nose
OPTIONAL: for the nose and hat decorations
Baubles, Bangles, Beads, tiny ornaments, bells, rick rack, rocks, etc.

INSTRUCTIONS FOR THE GNOME HAT:

Cut 1/2”, 3/4” or 1” from your empty TP roll and set it aside.

Pick a yarn color and cut 50 - 12” strings and set them aside. To do this you can short cut this step if you know how. Remind me if I forget to include this helpful hint. You do NOT have to be exact in your measurement. Eyeballing it or approximate is okay! I normally measure nothing. SIDE NOTE: You may or may not use all 50 strands of cut yarn but it will be darn close each time.

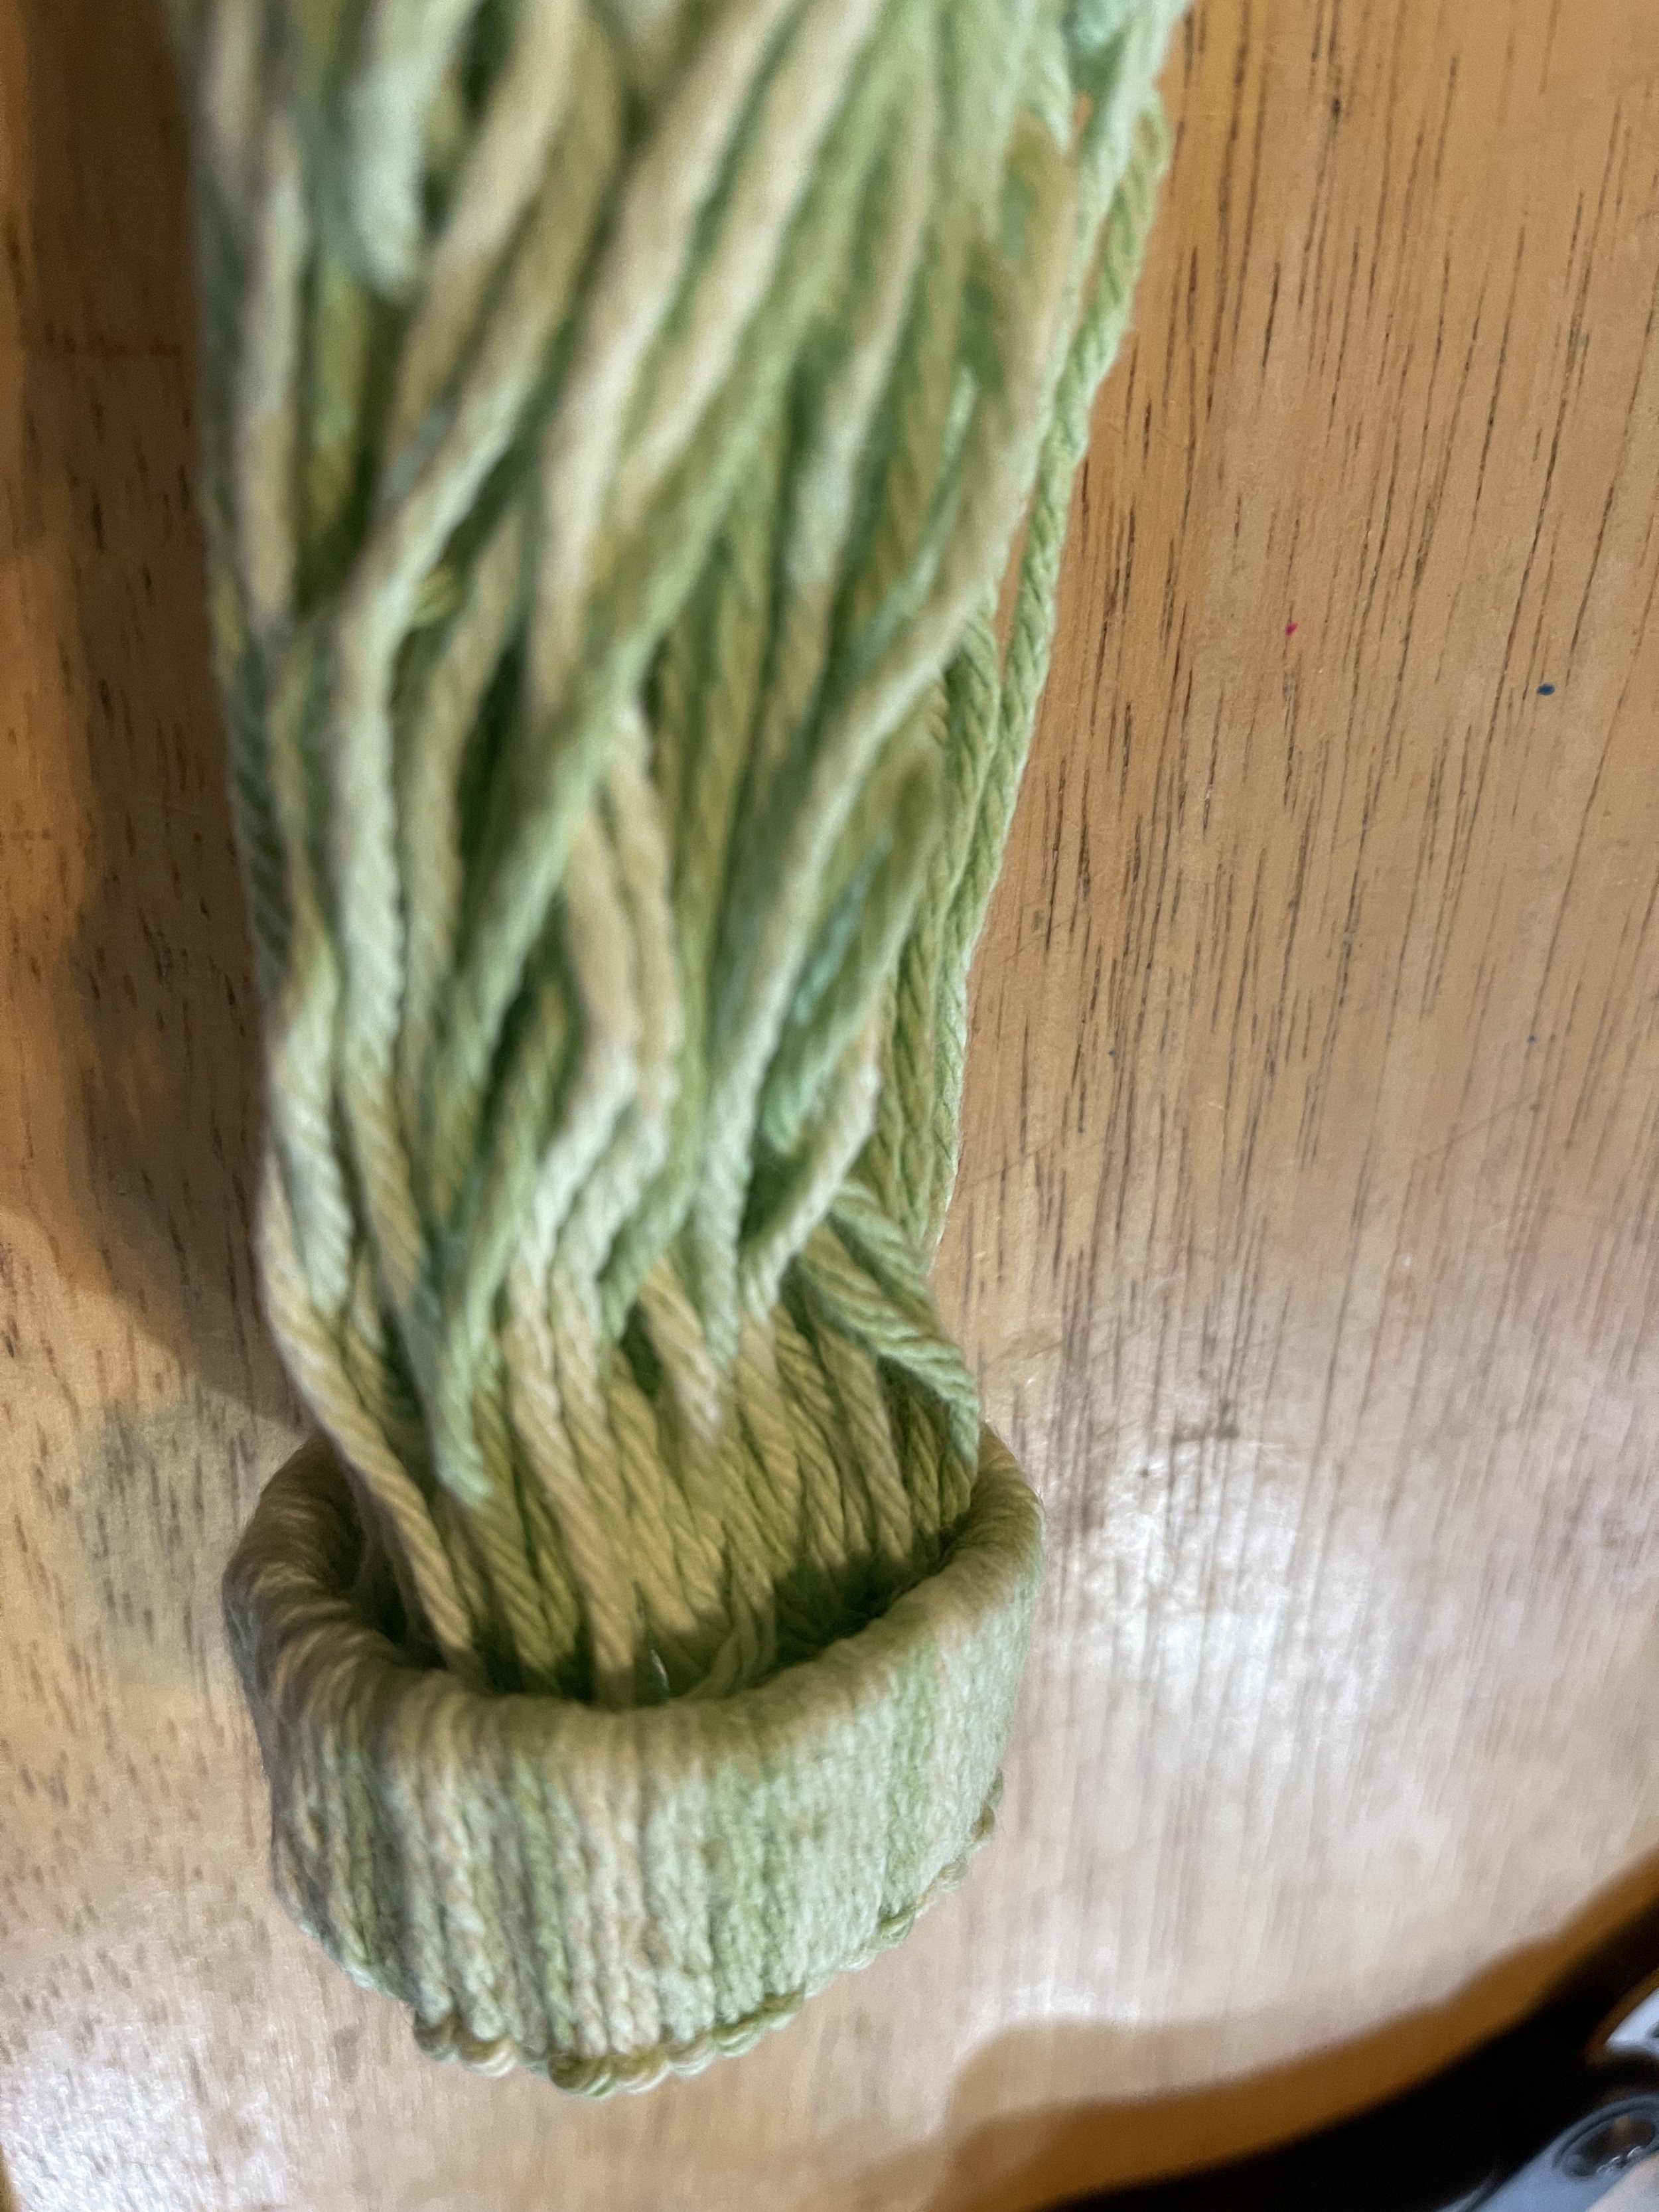
Loop each string around the TP roll making sure each loop if going in the same direction, snuggled up next to each loop. Your project will start to look like a jellyfish. The way you lay your loop through needs to be the direction of every loop created thereafter. My loop was threaded through right to left. This creates a finished brim look to your hat. Make sure each finished loop it tight against the last. No cardboard showing is key!

Once your loops are in place all the way around your ring, Push the loose ends through the center of the ring so the yarn strands are now dangling from the opposite side.

With a separate piece of yarn, tie all the strands of yard together about an inch or two above the hat rim. Tie it tight!!

Trim excess yarn above the tie to form a pom pom for the top of your hat. Set your hat aside.

Stuff the cottontails - 3-4 of them- inside hat

INSTRUCTIONS FOR THE BEARD:

Choose a second colored yarn.

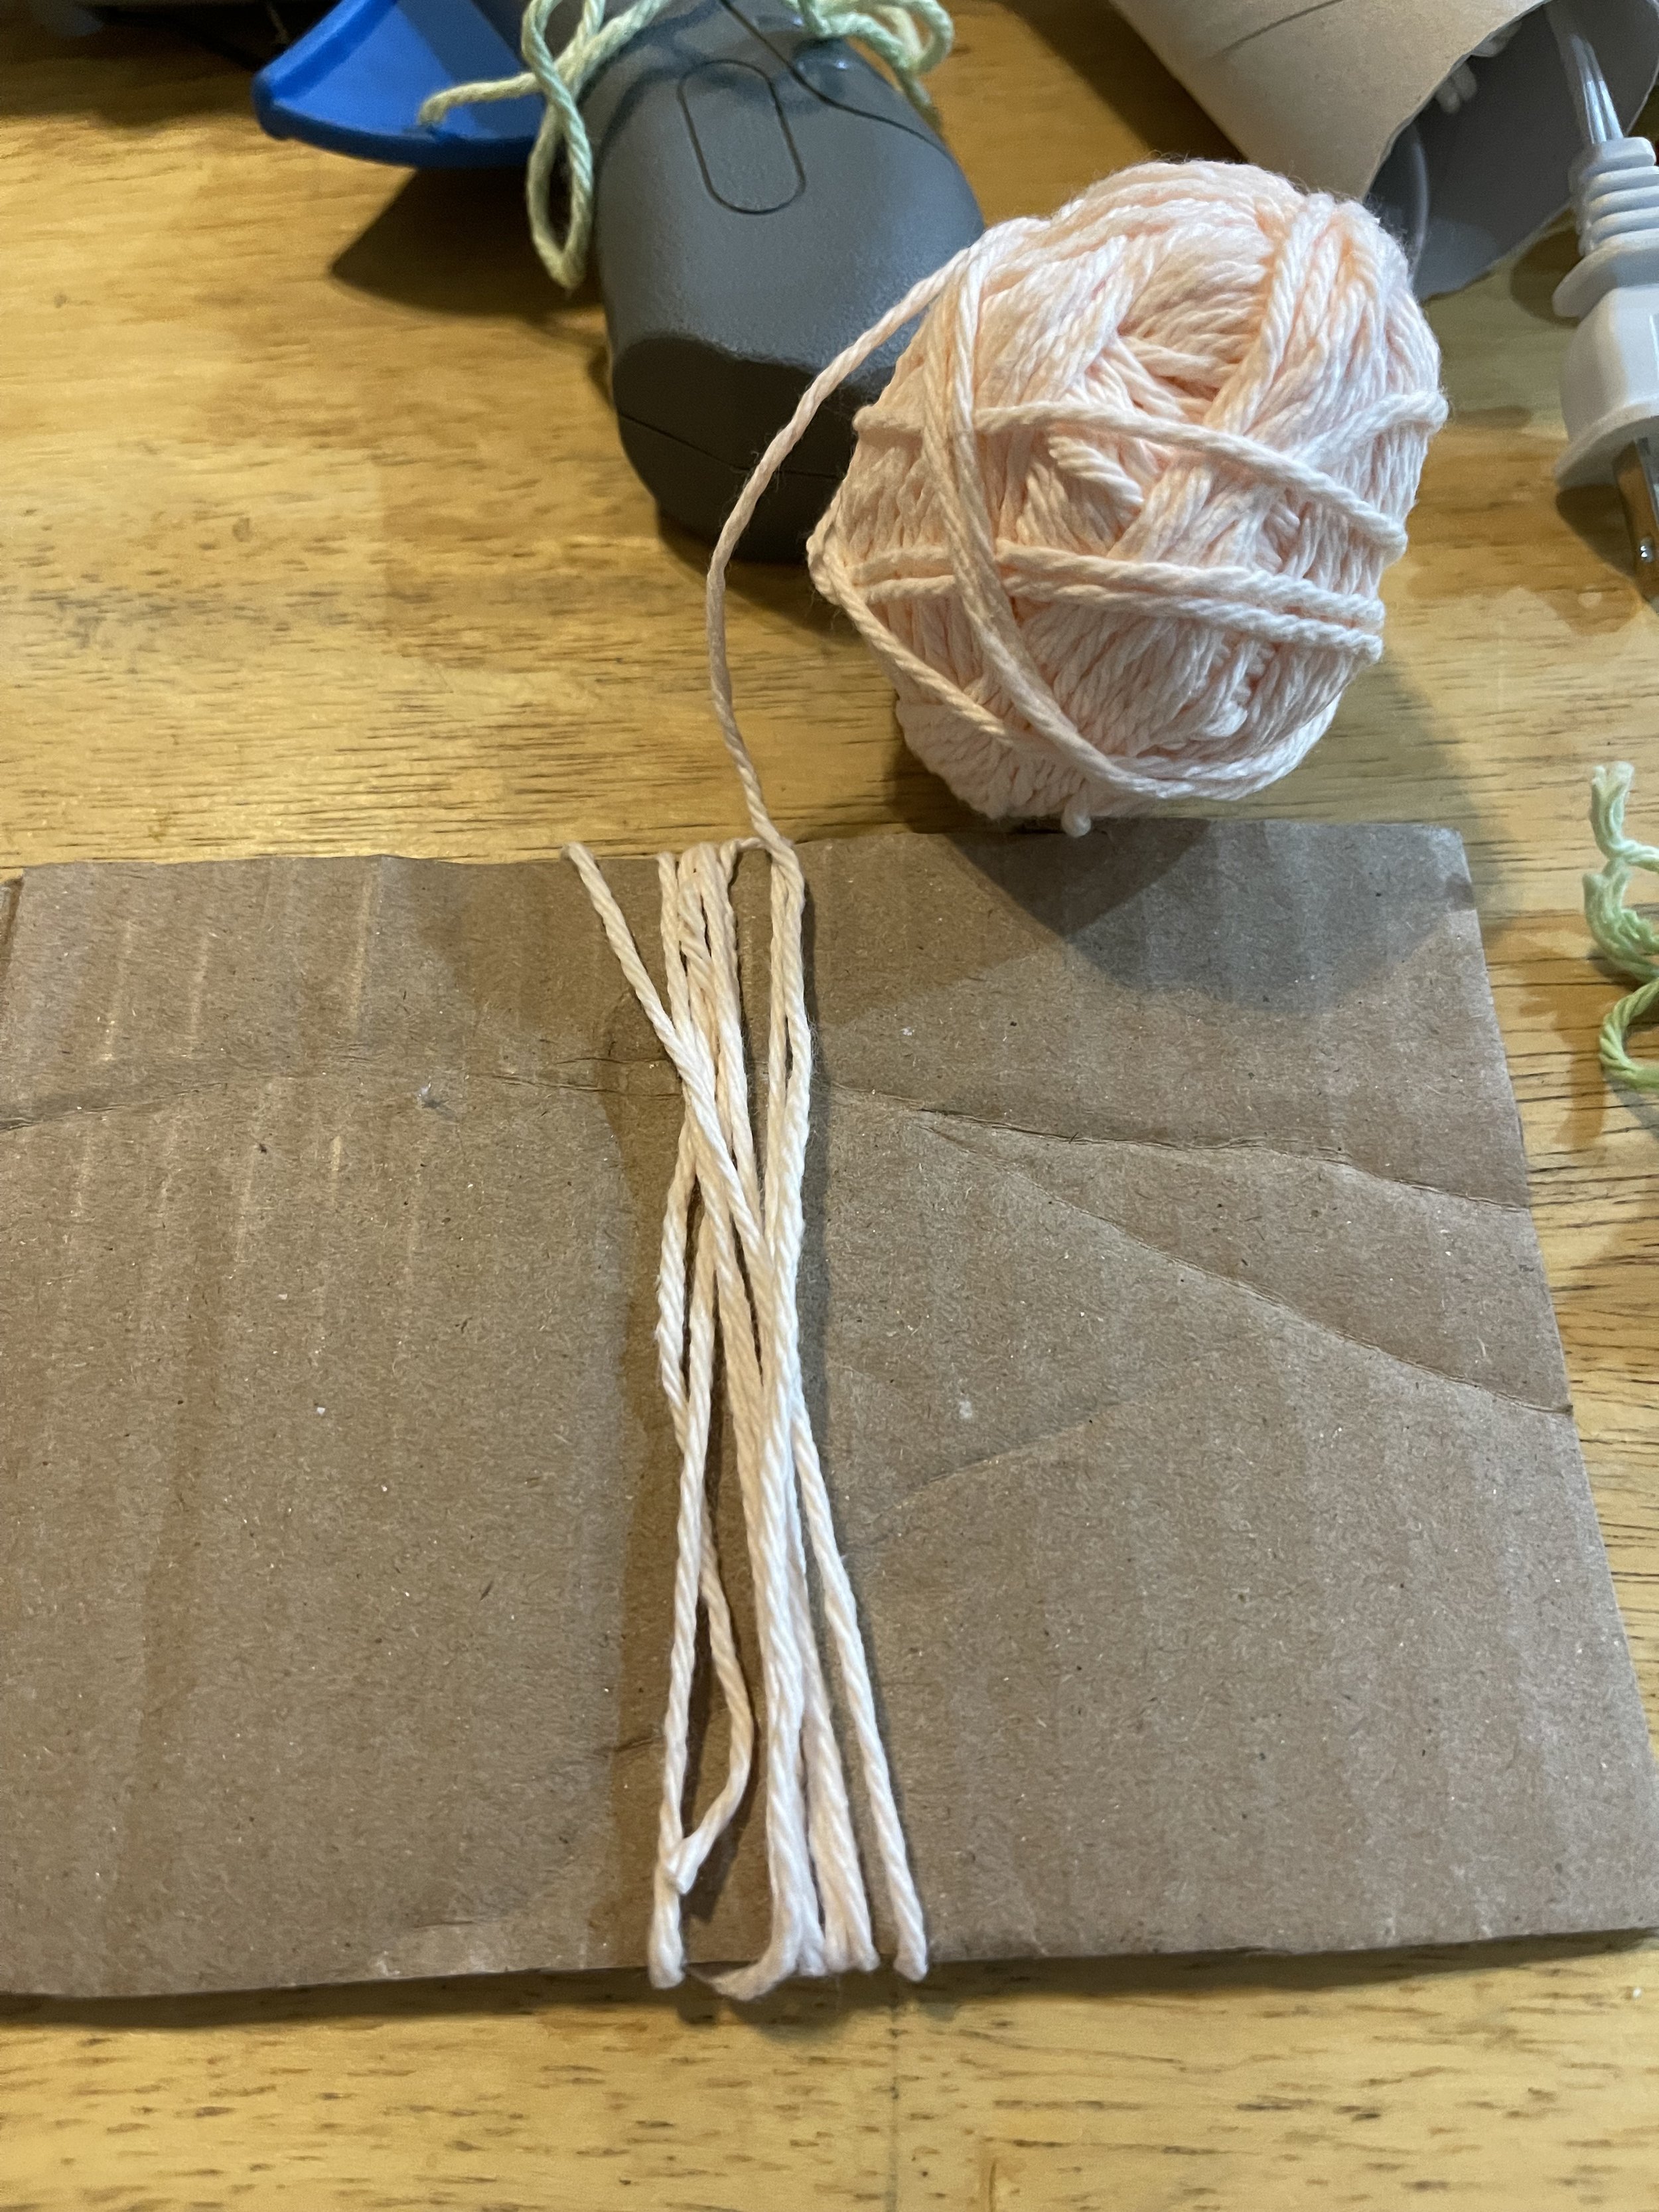
Using your piece of cardboard, wrap the new colored yarn around either the short or long way - I used both options - make sure you wrap it at least 40 rounds leaving the ends loose. Holding onto one side of the rounds (fingers through the loops,) Remove the loops from said cardboard. Lay on the table and tie the rounds together at the center - see pic for example.

Side Note: I discovered after making 5 Gnomes that the cardboard is not needed using an alternative method that is as follows: Cut 25-30 pieces of yarn that are
approximately 8” in length. Stack them and tie them in the middle. Trim or don’t trim to create the beard.

Hot glue the beard to the cottonballs and hat inside the rim.

Add Nose (and hat adornment if you so choose.)

*All yard is from ‘good intention’ projects that either were finished, 1/2 way finished or never started. Cottonballs were under the sink for a couple years as Mike hasn’t needed them to create more firestarters. (Cottonballs + vasoline or wax.) The noses are mini Christmas balls from some decoration I took apart at some point in my life. The embellishments: Snowflakes are upcycled hair pins I wore in my hair while marrying Mike. The crystal leaves are also from our wedding decor and the stones are from the Gnome Village. **

Did you make a Gnome? Please let me know in the comments and post a picture of your amazing creation. Have fun! As Always, question or clarity needed? Just ask!

Love, Light and Peace!

What to do with all this Pumpkin Purée!

You have made Pumpkin Puree, now what do you do?


If you are like us, you don’t want food to go to waste.  You take what you have in the garden, prep it, process it and use it throughout the year, hopefully having it gone by the next harvesting seasons. We do this with regularity, not knowing exactly what we are going to create with the food we’ve stored.  However, this year is different. 


With postal prices on the rise for sending perishables through the mail to others, we have decided to not do this at Christmas this year.  Last years bill for postage during the season was close to $500.00.  That’s a lot of money to send out your hard work to people who may not cherish those kinds of gifts.  We are just adding to the food waste when others reject what you’ve given them and throw it away.  It’s just a fact. 


Because we are not sending perishable items out this year, unless requested, we are left with full harvests of deliciousness in the cupboards.  So what do you do? We have 55.1 pounds of processed pumpkins in pure purée form.  We took into consideration that it would all be ours and so we chose to freeze it in measuring cup denominations for easy grabs and exact recipe measurements. We did 1/4, 1/3, and 1/2 cup cube or round sizes.  

We also did, what I call, “slab” sizes for soups and stews, chili, things of that nature which don’t require exact measurements when cooking like I do.  If said dishes require exact measurements, eyeballing will be required. To look at the ‘slabs’ it will be pretty easy to tell which are 2 to 2.5 cups, 3 to 3.5 cups and 4 cups respectively. Opening a package of puree that has more than you need can always be used for a second dish so nothing goes to waste. With exact measurements in the other packages you can take out exactly what you need while it is still frozen and vacuum seal the rest even using the same bag. That’s what I do.  You do what you feel is best and safest for you!!


So what to do with the now processed Pumpkin Purée that stares at you every time you open the freezer. Today, I am going to make my version of Pumpkin Chili, which is a variation of my regular chili.  I’m also going to compliment the dish with Gluten Free/ Dairy Free Pumpkin Cornbread Muffins. Together with a small side salad of red grapes and deep greens, this dish will keep you filled up and warm on a cold Autumn night when the sky darkens early. 

I added sour cream and cheese to Mike’s but it’s totally optional if you are wanting it completely Gluten and Dairy Free. You can make GF/DF sour cream from cashews. Let me know if you want the recipe and I’ll post that.

So let’s get started with WHAT YOU NEED for the Pumpkin Chili recipe:

Dutch Oven with lid or Cooking pot with lid

Bamboo Flat Front or a Wooden Spoon Flat Front - (these are cooking tools that are flat not rounded like a spoon.) You CAN use a wooden spoon  or any other kitchen tool you like to cook with.  There are no rules.

Either your stove or a single burner like we have, Induction Burner.  I use this when blogging as I can take better pictures along the way. 

Hot pads and a Ladle.

INGREDIENTS: The following are approximate measurements only.  I do not measure when making this recipe because measurements are not needed.

1 lb Ground Hamburger

1 lb Ground Pork

1 medium Onion chopped (or 2 t garlic powder)

Garlic (or 2 t onion powder)

64 oz Tomato Sauce (home canned or store bought)

6 oz Tomato Paste (home canned or store bought)

Pumpkin Puree (home canned or store bought)

Chili Beans (Kidney Beans soaked in chili spices. Home canned or store bought) -Do NOT drain.

1 15oz can Black Beans - drained

1/4 cupDark Red Chili Powder

1/4 cup Cumin

Salt to taste

Black Pepper to taste

INSTRUCTIONS:

1. Brown the ground beef and ground pork in your dutch oven or cooking pot until thoroughly cooked through.

2.   Chop onions and garlic

3.   Add chopped onions and garlic to meat mixture and cook until onions are soft and            translucent.  Takes about 5 -7 minutes.

4.   Add all the Tomato Sauce, Tomato Paste and Chili Beans, plus Black Beans.  Bring to a very low boil over. Stirring to mix it all together. Turn burner down to medium low.

5.  Fold in Pumpkin Puree and bring all ingredients to a low boil over medium heat. 

6.  Add in Salt, Pepper, Chili Pepper and Cumin, giving the chili a good stir. PLEASE             waft and taste test at this point. Adjust the spices to fit your taste buds. The measurements are approximates and probably an UNDERESTIMATE.

7.  Although you could eat your chili at this point, I recommend that you turn the burner to low, with the lid on your Dutch Oven or Cooking Pot, let your Pumpkin Chili cook for  45 minutes to an hour so the flavors can marry.  Stir occasionally. 

***Cooking the Chili with the lid on will also add liquid into the recipe.  Welcome this! 

SIDE NOTE: If you want to skip the spices, you can always purchase McCormack’s Chili Seasoning Packet instead - I recommend you use 2 packets. DO NOT ADD WATER! The pot’s condensation will do that for you. 

While your Pumpkin Chili is cooking, make your Gluten Free/Dairy Free Muffins. What you will need:

1 Mixing Bowl or KitchenAid

1 Whisk

1 Rubber Spatula

1 Muffin Tin (one that holds 12 muffins will do the whole recipe in one batch.)

   Measuring Cups and Spoons

INGREDIENTS and INSTRUCTIONS:  We use Bob’s Red Mill products because they are not cross contaminated in their processing. They guarantee it which we need because of one son having Celiac Disease and the other being allergic to certain tree nuts. 

In your mixing bowl, add and whisk together the following:

1 1/4 cup Bob’s Red Mill Cornmeal

1 cup Bob’s Red Mill Gluten Free Baking Flour

2 tsp Bob’s Red Mill Baking Powder (do not leave out this amount of BP.) 

1/2 - 1 tsp cinnamon - up to you 

1 pinch of Salt

Once whisked, add the following wet ingredients to the bowl using the whisk or spatula to combine with the dry ingredients:

3/4 cup Pumpkin Puree

2/3 cup Silk Dairy Free Whipping Cream (Give the whipping cream a quick shake before opening,)

1/3 cup water

2 eggs (large or 3 small)

1/4 cup pure honey or maple syrup (Used maple syrup for the batch pictured below.) 

2 T Avocado Oil, melted Earth Balance or Ghee

Preheat oven to 400 degrees.

Spray the Muffin Pan with Olive Oil to other form of spray oil

Scoop the mixture into the individual muffin spaces

Bake muffins for 15-20 minutes or until center is done.  We checked the muffins at 15 minutes and they needed two more minutes in our gas oven before being done. 

Cool out of the muffin pan on cooling racks.

**Serve as a compliment side to the Pumpkin Chili with warm honey or maple syrup drizzle.

Let me know in the COMMENTS BELOW if you try these ingredients or what you did to make it your own! 

Enjoy this Yumminess in Love, Light and Peace 

Onions on an Island

You know those rainy yet brief sun break filled Autumn days? We are having one of those today.  Just like predicting the weather after the Fourth of July, the weather where we are is a cacophony of emotional flip flops that match each child that come through school doors the day after Halloween. 

Child: Up, down, energetic, wild, depressed, sleepy, teary-eyed.  All lunchboxes have candy in them that the parents did not approve of . . . or did.  Pockets may be filled too so you have to be an eagle sighted staff member. Weather: heavy rain, sun, light rain, hail, dark cloud rain threat, sun, rain-rain, windy, rain and wind, calm, well you get the picture.  Sound familiar?  

I was born and raised in Oregon and live in this state still today.  The weather? It never disappoints.  We just dress our bodies and pack our cars with items for every weather occasion. Think I’m kidding?  In Oregon, especially in the beautiful Willamette Valley, one can experience rain, sun, snow, hail, wind, thunder, lightning, ice, HOT or many variables thereof in one day or just one weather pattern a day.  Today we had a combo of rain, sun breaks and mild temps. Today was a soup day.  I love soup days, don’t you?

I had 3 pounds of locally grown organic onions staring at me from the kitchen island for about 4 days now and to be honest, I stared at them right back. Gave them “the hairy eyeball” too every once in awhile to keep them inline. “No getting moldy” I would say to them when I walked by them.  I thought I had meant to order 3 onions but 3 pounds showed up so someone did something incorrectly. You know it was me as “Operator Error” has been my M.O. for about 3 weeks now. 

So, what is there to do with this bag of organic onions?  I could feel that they were on the edge of sprouting, so doing something, anything with the onions was in a time crunch. True organic, non-GMO, grown without chemical foods don’t last long unless stored correctly - which I didn’t do. We decided we would, after Halloween, use our electric slicer, slice them and put them in the dehydrator eventually turning the dried onions into powder. Halloween night came and went. Dehydrating the onions didn’t happen.  However we did turned them into a delicious meal. 

We chose to make a version, ‘Robin’s version,’ of French Onion Soup which I am going to share with you, in a moment. I will take you step by step, showing you what we did and how we kept it gluten and dairy free without sacrificing the scrumptious flavor a ‘normal’ French Onion Soup has.

First I want to mention, if you have allergies to gluten or dairy, maybe both like our son, READ ALL INGREDIENTS printed on the products you use in a recipe. Research the company who manufacture the product to make sure it is a CLEAN facility so no cross contamination of gluten or dairy happens in processing.. Make sure you are aware of the ‘other’ names or words used in relation to said allergies. Sometimes, ingredients closely related to or listed under an alternative name can cause problems for a person with allergies. You want to purchase and use products that are 100% safe for all to enjoy. 

The Gluten Free/Dairy Free Challenge: Not only do we have an offspring who is celiac, we have one who is allergic to tree nuts so meals get wonky when all want to eat what ‘Mom is cooking.’ Here’s a few things we have to do before we make any meal, snack or BBQ:

Any products that use cow’s milk, whey or butter, creamer in any form. Even if it says “Gluten Free” or “Dairy Free,” READ the ingredients!!!  A product can be free of gluten but full of dairy and vise versa.  An example of that is Dairy Free ice cream. Some brands contain gluten. 

Wine vinegars. Some contain gluten.  Some wines contain gluten. My point is READ THE INGREDIENTS for the ingredients if you’re trying to stay Gluten and Dairy free. It’s crazy the knowledge I’ve gained by researching the foods, spices and herbs, store bought that go into a recipe.  We also have a child who has TREE NUT allergies so sometimes it’s gets a little time consuming to make a meal that is free from all allergens. 


FRENCH ONION SOUP -not the oven cooked version Serves: 4-6 people Prep Time: 15 minutes Cook Time: 1 hour 30 minutes

Kitchen Equipment and Tools needed: Dutch Oven or 6-8 quart cooking pot Wooden Spoon or your favorite utensil to use while sautéing is said Dutch Oven or Pot. I use a bamboo spoon/spatula combo looking utensil.  Measuring cups and spoons - unless you want to wing it/eyeball it/ you do you! Some recipes I eyeball it and some I actually measure. Did a little of both for this recipe. Stove or Hot plate. I used a single burner induction burner as I my feet hurt after all the decorating and I wanted to sit my fanny down. 


INGREDIENTS: 

3 pounds of sweet onions - the fresher the better usually but not necessary.  Ours were on the cusp of being back in the garden to grow anew.  I recommend organic and non-gmo but you do your own preference.  3 Tablespoons Earth Balance.  It’s non-dairy yummy. You can also use Ghee, or whatever your heart desires.  Olive oil included. You could also use a combo of Olive Oil and any of the listed ingredients above 1/4 cup White Wine Vinegar.  You can sub with an equal amount of Apple Cider Vinegar. 5-6 cups Beef Bone Broth - if I don’t have any homemade, we will use Pacific Foods Organic brand - also low sodium.  Again, you use the brand you like.  1 cup Gluten Free White Wine 2-3 Tablespoons Worcestershire Sauce - the measurement is approximate and I do a couple ‘tip and quick pours.’  It is also an optional ingredient.  1 Tablespoon Gluten Free flour or cornstarch - for thickening. We use Bob’s Red Mill Gluten Free Flour. Salt and Pepper to taste - salt is always optional as it’s included in so many other ingredients. Baguette - you guessed it, they make Gluten Free/Dairy Free yumminess. Schur brand makes them.  Franz may make them or make your own.  DAIRY FREE Parmesan ‘Cheese’ that is delicious.  Whole Foods carries this. You will have to shred it. I recommend Gruyère Cheese for those who can eat dairy.

Steps to create the soup:

Peel off the onion paper and slice each onion to your desired thickness. We used our electric slicer this time for consistent thickness. Let’s face it, my hand slicing is less that desired and end up with thicknesses all over the board. I wanted the slices to be at least pretty for a blog picture. (I’m laughing.)

Melt butter/oil, whatever you are using in the D.O. or Pot over medium heat. Add the          sliced onions to the melted goodness and slowly caramelize them.  This is the longest part longest part of the whole recipe.  Caramelizing onions can take 45-60 minutes so be patient!  You don’t want to cook them too quickly as a nice brownish color takes time. DO NOT OVER STIR/MIX - INFREQUENT STIRRING REQUIRED.

Once the onions are caramelized, keep the D.O. or pot at Medium heat and White Wine, White wine vinegar, pepper and salt if desired. Stir into the onions and add the flour. Cook all for 2 or 3 minutes. 

Slowly add in the Beef Broth, giving a quick stir after a couple cups have been added.   Repeat the add and stir until all liquid has been added.  Bring mixture to a simmer and let your soup cook for about 30 minutes or longer - your choice. 

While your soup is on the stove marrying all the ingredients together, prep the baguette.  To do this, Slice the baguette length wise or keep it whole and slice into rounds. We chose lengthwise and then cut those into six inch pieces. We did not butter the bread.  We shredded the Dairy Free Parmesan Cheese, sprinkling it on the bread.  We then placed the bread under the broiler until the cheese melted and edges were a beautiful shade of brown. 

Plate the soup in individual soup bowls.  Cut or cube broiled cheese bread.  Add to the top of your soup and serve garnished with a bit more Dairy Free Parmesan.  

Side Note: You do have the option to plate soup in individual oven safe bowls, add baguette then cover entire surface of the bowl of soup and bread with cheese. Broil the deliciousness under the broiler for a few minutes, removing from oven when cheese is melted and beautiful brown on the edges. 

Whatever you do, gluten free/dairy free or regular soup, ENJOY each bite to the last drop of broth. The HEALTH BENEFITS OF EATING ONIONS many! To read more about those benefits you can go to this article. I don’t think you can click the link but you can copy and paste into your browser! https://spiceworldinc.com/health/10-health-benefits-of-onions/

As Always, please leave questions and comments in the comment section below! Be kind. Be compassionate and understanding of others. We are all different and beautiful!

Love, Light and Peace

Happy Halloween Pumpkins

I love Halloween with all the festive parties and decorations! Our neighborhood used to be so lit up with decorations and even shared a little friendly ‘competitive’ spirit to see who would do what for their decorations each year. Total innocent fun as there was never a repeat. Each house was always decorated differently from the next then the pandemic hit and no one put out any decorations. The last couple Halloweens have been dark and sad. . . but not this year!

It is so fun to see the neighborhood come alive with excitement again! Everyone outside decorating and having fun doing so. Spooky sounds and songs have filled the air while it seems every person in the households participate in the preparation for Halloween. Being a modern day homestead, we decided to create a Witches covenstead. If you don’t know, a “Witch’s Covenstead” is, well, their home, so we created a scene that made sense. . . it tells a story.

In our story, the elder Witch enjoys conjuring up brews and spirits in her home that is adorned with pumpkins, candles, a Mummy and several skeletons. Outside in the graveyard and overhead are flying Witches and Bats plus her many ‘Sisters’ surround a cauldron of spell making ingredients while some ‘Sisters’ stand guard making sure there are no unwanted guests. Oh sure, the ‘Sisters’ will pick and choose who and what they will let past to ‘join’ the festivities but not before they welcome them with a cackle or two.

We have also added another new element to the decorations. Instead of carving our pumpkins, we are adding whole pumpkins to our outside experience and there is a really good reason. We are going to make pumpkin puree out of them when we are finished with them in the ‘graveyard.’ All pumpkins (and squash,) are edible but some are sweeter than others. Since the Witches won’t be needing them and we are not picky about sweetness, these Jack-o-lantern wanna be’s will be perfect for our puree.

When wanting to make pumpkin puree, decide what you will be using it for. Will it be bread, pie, cookies or what we use it for, our dogs intestinal health. Homemade dog treats or cookies keeps them eliminating regularly so as they age, constipation isn’t an issue. Pumpkin is also, along with Zucchini, a natural dewormer for our Chickens. We only have one right now but she gets to have a healthy intestinal tract too!

Once you’ve decided what you are going to use your pumpkins for, there are some pumpkin varieties that go with specifically what your needs are. For instance, sweet or sugar pumpkins are great for baking. There are a rainbow of colors and varieties to choose from for this, however, a good cultivated specifically for baking is the best. These pumpkins are small, round and heavy for their size. Our larger pumpkins will have a more stringy flesh when cooking them down so an Emerson Blender or Blender will be necessary if we want a puree. If we want chunks, we will cut it that way, pre-freeze for one hour before vacuum sealing the chunks in bags for later use.

Side Note: To make the pumpkins easier to peel, we will bake them at 375 degrees F in the oven for at for about 15-30 minutes (small), 30-45 minutes (medium), 45-60 minutes (large,) making sure it is fork tender., cool for a bit, peel the skin off, then process.

We tried to ‘potato peel’ the skins off our last batch of our garden grown pumpkin but I don’t recommend it. One of two things will happen if you have patience like me. Number one, you will accuse every potato peeler you have in your drawer of being dull and old and stupid and useless or, number two, you will change to using a really good chef knife and accusing it of the same thing. You might even want to throw said knife at the wall followed by the pumpkin that is not peeling as you feel it should. I vowed to NEVER to make puree again as it was just too hard to do that way. Did I research prior? Nope. Just decided to do it the hard way. Oy!

Don’t forget to process your pumpkin correctly for safety reasons after you do all the hard work it takes to get your desired cubes, (chunks,) slices. If you want puree, freeze it (Ice cube trays work great for this,) or use it within a few days. If you are planning on doing home canning, you MUST use the PRESSURE CANNING METHOD. Pumpkin is a low-acidic food so DO NOT use the water bath method.

This is a good link to learn more about Pumpkin Food Preservation:
https://nchfp.uga.edu/tips/fall/pumpkins.html#:~:text=To%20be%20safe%2C%20all%20low,(Ensuring%20Safe%20Canned%20Foods).

Question: What do you like to do with your pumpkins? Leave a comment in the comment section so we can all learn from each other!
Whatever you do today aside from Pumpkin Prep, be safe, have fun, do good in the world. HAPPY HALLOWEEN!


Love, Light and Peace


Garden Preparation after Spring and Summer Harvests

Did your garden last longer than you had ever imagined? Ours did as we had an extended summer here in the Willamette Valley. I am not complaining! We were able to extend the grow life for many of our edible and medicinal plants. To us, the extended season meant more provisions for us and others. Can’t argue with that!

Now that we have harvested the final crops of tomatoes and peppers, it was time to prep their growing areas so the ecosystems created underground could remain active throughout the fall and winter months. Keeping these systems active will only enhance the growing and fruiting capabilities of the new seeds or plants in the spring and summer. So how do Mike and I do that and, on a deeper level, why?

I try always to find out when the first frost will come and try to get our winter crops in the ground so the roots can be established before winter hits. We have Italian Garlic and Elephant Garlic in two troughs this year. We added a trough knowing that we can grow many other crops in the same ground once the garlic is ready and harvested. To prepare the garlic troughs, we did nothing but stick the garlic in the ground. We will put a layer of compost on top before the first frost. We do not fertilize with anything but our chicken’s waste which is mixed into the compost.

Yesterday was a huge garden day. We decided that it was time to get all the tomatoes, red or green, off the vines as we are expecting a lot of rain in the next few days plus cooler temps. Neither one of these are bad for the tomatoes but we wanted to get as much prep work done in the garden as possible. Since tomatoes don’t have a problem ripening on their own, we harvested them all. 42 pounds worth! Such a great haul to add to the 58 pounds we already have in the freezer. On a side note: Sometimes you have to add a green banana to the tomato boxes to encourage the green tomatoes to turn red.

How did we do this? Very methodically is my answer and why my arms ache today. I started by finding the tomatoes that were easy to see and pick on the outer vines of the plants. Easy peasy, no trimming necessary. Could easily do this without Mike’s pair of hands. Moving inside each plant was a little more complicated as the branches and vines were all intertwined and tightly snug like a bunch of tangled ribbons. Because the vines were so entangled and because said vines were thick, Mike was there to help spot tomatoes I was missing and I gingerly snipped the vines back and pulled them toward me. We clipped the tomatoes from the vines and Mike placed them in our containers, take the full containers to the house and eventually weighing them all.

We repeated this process for every tomato plant in our six foot trough and our four foot trough. The six trough was done first as the vine growth was less complicated that the four foot trough in between the white trellis. Still crazy tight, I clipped the plants down to where they were still two inches above dirt level. Once we got all the tomatoes out of the tree at the four foot trough, we cut the plants to the same height. Why?

We leave the plants from our old garden in the ground to help feed the microbes which in the long term, create fertile soil. It also preps that ground to receive the new plants into it’s already knowledgeable soil. It knows how to grow the same plant next season! It creates its own ecosystem for not only soil, but bugs and worms and even birds or animals. Good soil, good eats for everyone! Not only do we leave the plants in to decompose, all the clippings go on top of the now shortened plants to help protect overwintering beneficial insects.

So leave plants in the ground, stalks a couple inches above said ground so they can feed the microbes in the soil. Microbes live around the roots of the old plants, again keeping the ground fertile and those microbes help the future plants. Composting the exact material from the plants that grew in that spot, keeps the ground ready to accept the new (same) plants and get them started on their growing journey in the spring. Honestly I am no scientist, so technical terms are not my thing. Knowing what is right for our garden is and sometimes that means listening to the needs of the soil and plants.

We were taught to pull the old plants, till the garden soil and fertilize as a way of having a garden. We don’t do any of that like they used to do. We have chosen to grow most of our foods in containers of all sizes. Our grapes, cherries and apples are the only things in our ground, so the container soil needs a lot of love and care. Leaving the root of old plants in the ground helps tremendously. Side Note: Trees will love you if you sprinkle around their base with used coffee grounds. Don’t drink coffee? Ask coffee shops if you can have their spent grounds. Our trees love them!

We also harvested the last of our pepper garden and cut those plants down within a couple of inches above their soil leaving the roots in ground. The cutting s went directly on top of the old plants. It’s easy compost and makes for happy soil, insects and new plants of the same kind in the Spring.

Right now in ground growing are our garlic, carrots and lettuce, potatoes, celery, a few squash and several medicinal herbs that grow well all year long in any type of weather we’ve faced here in the Willamette Valley. Is that normal for everyone? I haven’t a clue. Most even made it through the ice storm we had a couple years ago. Not going to press my luck on the ice if we have any this year. I am going to process as much as I can prior to that!

However you choose to treat your garden, I hope it’s a choice where your plants flourish. It helps that we walk around all year long infusing our garden with love and encouragement as we are grateful that it feeds us, shades us and calms us everyday. We are getting closer and closer to being self sustaining which is a big goal for us. We are open to learning new things while keeping our garden chemical free by naturally organic means.

Well that’s our big secret to growing a thriving garden. Making our own soil, composting, leaving roots in the ground and covering the growing areas with the debris from it’s old plants. Those growing areas that don’t have debris because the whole plant is edible will get a layer of mulch over the newly planted seeds and bulbs for protection.

Robin’s Tip: We do not harvest all the carrots when they are ready. Nor do we pull up all the potatoes, onions, beets, turnips or celery. You can cover them with a good amount of straw and dig them up as needed until the ground freezes. I have actually dug them up after the ground freezes and used them. It was no problem but recommend you follow the rule “until the ground freezes” to be safe.

**The pictures below are of the tomato trough and the pepper troughs. The tomato picture is the last harvest. The pepper picture is the second to last harvest we picked a few days prior. We only picked 22 more bell peppers and a hand full of Sriracha, jalapeños and Jimmy Nardellos.

As Always, happy gardening with Love, Light and Peace!


Freeze Drying - is it a good option?

Mike and I have been entertaining the thought of investing in a Freeze Dryer to help with the large harvests of foods we get each year and the abundance of meal prepping we do. Of course there is always a question as to what to do with the leftovers when you’ve cooked for an army instead of a family of four. Is there any other way to cook? There is always room at our table for more hungry humans as cooking for many is easier for me than cooking for a few.

We started looking at Freezer Dryers when we started running out of Freezer space and shelf space for our home canned goods that had multiple jars filled with fruit. Freeze drying fruit would be not only space saving but delicious as well. We dehydrate a lot of fruit but it is still sticky and causes a big mess in the dehydrators at times. Mike would love to freeze dry ice cream as that was one of his favorite treats when he would go camping with his freeze dried packets of food. He cracks me up!

We started to research Freeze Dryers pros and cons. Since this was a topic of conversation with our daughter this past weekend, I thought maybe others would also benefit from what we have learned over the last couple of years.

First and foremost purchasing a Freeze Dryer of any kind is an investment. A huge financial investment. For a Home Freeze Dryer such as HARVEST RIGHT, a small FD begins at around $2500 (without oil free pump,) to a large FD which costs around $3600 (without the oil free pump.) To purchase one of these Freeze Dryers with the oil free pump, you need to tack on another $1500 to each price. They do have occasional sales if you want to save $100-$300. Easy and low maintenance. They also sell accessories that you will need so you can see how this would be a huge investment. We feel that if we are going to invest in this machine, we want it to be top producing with little headache so the oil free pump would be part of that investment.

Another investment on top of cost is time. Average time to Freeze Dry a food is 20-40 hours because of the process stages the food goes through. There are 3 phases: Freezing, Vacuum Pump and Drying. These phases are all done by the machine which comes with a guide book for the settings. If you buy a Freeze Dryer from Harvest Right, it actually comes with most everything you need if you don’t buy the oil free pump. It includes the oil for the basic pump. You may see a small jump in your electric bill too. You should probably find out what your cost would be should you choose to invest. I think average cost per month if you used it for 10 days is about $35. Not our quote. Used the quote found when researching recently.

I mention Harvest Right because they offer various sizes for home freeze drying and home freeze drying is their focus. They also sell Pharmaceutical, Commercial and Scientific/Lab Freeze Dryers as well. Harvest Right is not the only company out there that sells freeze dryers but it is the only one I found that has one that is specifically for home freeze drying. So what are the pros and cons?

For us, the fact that preserving you food this way is the healthiest choice. Freeze dried retains its nutrition and quality, when done correctly for up to 25 years. Texture remains the same as well. For instance, we will be getting a new flock of layer chickens in the early spring. With 8 new ladies, there will be an abundance of eggs. Freeze drying eggs is an awesome way to preserve them besides Water Glassing or Freezing them. Love that they would retain their nutrition and flavor in powder form. Cooking meals and baking both benefit from freeze dried eggs.

Another advantage to freeze drying your food is you can get more food into your containers which means less crowding on shelves in pantries. Let’s take those farm fresh eggs for an example of space saving. On average, it takes 48 freeze dried eggs to fill a one quart glass jar! I also want to explain that to freeze dry eggs, you need to crack the eggs into a bowl and whisk them together like you would if making scrambled eggs. You would then pour them into the freeze drying pans to be processed.

So, right now price of the machine, pump and accessories are the only ‘Cons’ that I can see. Then benefits of freeing up space on shelves and in the regular freezer far outweigh those cons. Soups, stews, full dinners freeze dried can only be an advantage when camping or hiking, or needing a quick meal. Add water and stir. Freeze drying milk, fruit, veggies, are all money saving ideas, plus the nutritional value, alone, is a huge benefit.

What can you store your freeze dried yummies in? This is a good question because I automatically reach for glass mason jars. You can sanitize them and they hold quite a bit which works for the way I cook. The foods look pretty in them and I like to see the levels of each food to know if it is time to do more preserving. So let’s look at ways to store your hard work! Use mason jars ONLY if you plan to eat these foods in the near future. Glass jars preserve foods for SHORT TERM, 0-1 year.

Side Note: I would not preserve all of my eggs this way unless I was sure I could use 48 powdered eggs in a year.

Another way to preserve your freeze dried foods is in Vacuum Sealed Bags. The Vacuum Sealer and Bags are a small investment but if you take care of it, it can last for years. We’ve had ours for about 7 years and it’s used ALL the time! Again, you can find it on Amazon. Vacuum sealing freeze dried goods is wonderful except for high-protein foods or meats. (Use Mylar bags and silica packets.) Shelf life for vacuum sealing is 1-10 years.

All storage containers MUST be AIRTIGHT or the moisture from the air will be reabsorbed and your food will spoil. I recommend silica packets to help prevent this. You can find them on Amazon for a nominal charge. Mylar bags, also found on Amazon, come with silica packets and labels, also a nominal charge. Mylar bags will also give you the LONGEST PRESERVATION TIME - 25 YEARS Make sure to remove as much of the air as possible during the sealing process.

To us, the investment is worth every penny. Between our daughter and ourselves, the machine would pay for itself many times over through the years. Making a decision to invest in a Freeze Dryer is not an easy one. Weighing all factors is a must. Dollars, Time, Energy, Maintenance, Space, all have a roll in the decision. We are looking to invest in one next summer. Until then, we will keep doing our research making sure that the machine and the money, are 100% worth it.

There is so much more that we learned about Freeze Dryers and Freeze Drying. I think I will leave you with all of the above for a start if you’re interested. There is a plethora of information out there and you just have to weed through the good and the bad. Everyone has an opinion online.

Please feel free to leave a comment or question below and I will do my best to answer all questions thoroughly. Until then, happy food preservation!

Love, Light and Peace!

"Nuts" and "Bolts"

Getting ready for travel can sometimes be a bit difficult when running a modern day homestead. With the beautiful weather, the garden continues to grow and produce fruits, veggies, herbs and nuts. We are beyond grateful for the extra garden goodness, but it also means, continued harvests and preserving so nothing goes to waste.

On top of that, preparing for a 5 day camping trip means, for us, at least 3 or 4 days to be ahead of the game. Thank goodness we have an RV where we can just fill the cupboards, refrigerator, throw the clothes and toiletries in, hitch up and go. We’ve got that part down! I am adamant about meal planning when it comes to us taking a trip. Balance and nutrition are top priority and home grown or prepped is best. The menu is planned but the ingredients are interchangeable so we don’t have to stick with it. We have options and 80% of the foods, spices and herbs were from our backyard, meats locally sourced and add ons: Quinoa, brown rice etc., were from researched sources of good quality.

In amongst all this prep work, meal planning and packing is homesteading duties. For instance yesterday while Mike was doing some chores around the house, I was processing our gifted Filberts for the dehydrators. Washing the filberts, picking out the debris and then getting those little suckers to not roll of dehydrator racks was a task! Sounds easy but it wasn’t. Laugh worthy but easy, no.

I’m always a little kerfuffled when I am trying to do what I think is a simple task and it starts going sideways. I find out very quickly that I actually need 2-4 extra hands to help hold everything in place while I, in this case, place the Filberts on the dehydrating trays. One hand to hold the tray level. Two hands to guard the sides of said tray so they nuts don’t roll of and another hand to pick up the ones that did escape onto the garage floor, which now have to be washed again. Anyway, I wasn’t born an Octopus so the struggle was real. I am happy to report ath I found my rhythm and all Filberts, including the runaways are happily dehydrating in the Excalibur Dehydrator.

Our dehydrators have saved our bacon on several occasions when there wasn’t any time to spare for an alternative process to preserve culinary and medicinal for long term. We have 3 different dehydrators and we use them according to their strengths. They are as follows:

  1. Our oldest dehydrator is one that Mike bought at a farm store in Brooks, Oregon at least 40 years ago! It’s a wooden box with wood framed wire screened removable dehydrating racks. The heat source is a light bulb that puts out heat circulated by a little motor and fan. It is LOUD but it works like a dream! We use it to process foods that need a high processing heat - 135 to 145 degrees. Some fruits and it’s great for meats. We can do anything in it, really but you have to check it every couple of hours so you don’t over process or burn the foods.

    2. The “Middle Child” Dehydrator is a Nesco Garden Master. We’ve had it for about 7 years. It can handle anything we put in it. It is our round beauty which came with not only the airflow racks but also solid racks to make things like fruit leather. I’m not sure if the new models come with those extra trays but they sure are handy! When drying foods like Jalapeños, we use a solid tray at the very bottom of the dehydrator to catch all the seeds. It’s wonderful!

    3. Our newest one we purchased 3 years ago. The Excalibur lives up to its name as it dehydrates foods beautifully. It’s metal with sleek dehydrating racks and it’s super easy to clean. Actually they all are come to think of it.

**I include name brands because it may help you shop for something the meets your needs. I don’t have any affiliates or links for you to click at this time. The last two dehydrators can be found on Amazon. You can assume that the tools I/we use are from the ‘Zon unless I tell you otherwise. The ‘Zon and I are besties.

So grateful for the helpers listed about! The Filberts are getting a head start on the drying process in the Excalibur. I thought about drying them the old fashioned way which is spread out on the floor in a warm room for 4-8 weeks. My grandmother did this method on their ‘back porch’ room which was really the gathering room for watching spots or to watch Grammy sew or do laundry. They were all over and the stand alone heater would be cranked up high to dry, really any nut that needed drying.

Like I said, I thought about drying the Filberts the old fashion way for about a nano second. Being a modern day homestead, I need to get things done faster than they used to be done. I make no apologies for that. I do believe that ancestral ways have a place when it comes to certain veggie and herb preservation. Hanging herbs, for instance, can preserve the flavor better than in a dehydrator. If you aren’t on top of watching the time when it comes to hours in the dehydrator as it can over process, even burn. Hanging some herbs and veggies would work as well however you need the room and the correct conditions for it.

When hanging foods and herbs, control of the temp in the hanging area is crucial to the success of the drying process. Herbs can be stored wherever humidity is low and air circulation is good. A kitchen window is perfect or we hung our mint in the garage as it has both airflow and low humidity. Garlic on the other hand does not like sunlight (direct) and is best to hang it in clusters tied together from the rafters. In our case, we have no rafters so a nail in the wall works. Temp needs to be 45 - 50 degrees and leave the dirt on it. Just pull it and hang it in bunches bound with twine. It can take a couple months to dry. When all the foliage is good and brown, it’s done. Do not use this method is you live in high humidity. Oven or dehydrator would be the more successful way to dry your garlic. As with anything that gets dinged when digging or pulling it up. If the garlic bulb should get exposed, use it with in a few days. Drying is for long term storage.

Whatever you choose to do when preserving, make sure you know all the ins and outs before you begin otherwise one of two things will happen. 1. You will be lucky and it all works out, or, 2. You will learn the hard way like I did and lose a lot of precious food.

As always, if I can answer any questions for you or you’re curious about something, please feel free to ask me in the comment section. I will answer you and if you have a bunch of questions, I will answer in a blog like I did when answering Meredith.

Love, Light and Peace!


Gardening Questions Answered

I don’t claim to be an expert when it comes to gardening but I do know what works for us. I am not an educated Master Gardener like my Mom but I have done a ton of research and asked a lot of questions to people who are, indeed, Masters of their Gardens. With that information I had taken some to heart and thrown some out that didn’t fit our ways of gardening. This blog is about answering some questions I received the other day. i’m hoping that the information I give in those answers will be helpful. Again, I am not an expert so take the information, use it or don’t as I only know what works for us!

Meredith Taylor - THE QUESTIONS:

OK made a visit to your website. I LOVE the photos! I read the first blog. Will read more when I'm done with my chores. I'm definitely going to try your potato bisque soup. That looks GOOD. I'm glad you posted the recipe. You mentioned you folks made composted soil. Can you tell me how you make it, please. Would like to get some going. Also, maybe you can answer this. Last spring I bought some dwarf fruit trees. Surprisingly, I did get some fruit this year considering I hadn't had them a year but my apples were scabby. Do you or Mike know want I can do next year to prevent scabby apples? And, I know now is not the time to fertilize the trees considering they are going into a dormant stage soon, but do you folks have tips on winterizing them? What is your take on lime? I have seen some farmers spread lime in vineyards and orchards this fall. Should I sprinkle a bit of lime around them? Any tips would be helpful and the website is wonderful. Will read more when I get back in. Thanks in advance.

THE ANSWERS:

You don’t know how much I love all these questions, Meredith!  This may be my longest blog yet but there is so much information to give you and others who might be interested!  Also if anyone else has tips and tricks to share, please do!  Let’s take the questions one at a time.

1. Why do we make our own soil? 

The number one reason is we can control what goes into the soil.  We believe that the soil should have no chemicals in it in order for the plants to live their best lives and provide their best food for us. It has taken a long time to create a balance of goodness in which to plant a seed or a start, a tree or a shrub.  Right now we have way over 100 culinary and medicinal plants in our garden so it’s super important the nothing but the best soil be their home. We have designated troughs and areas for specific edibles so we can also directly compost into their areas with their own matter. Example: The trough that holds our bell peppers gets all the parts of the bell peppers we don’t keep.  The stems, the seeds, etc., get thrown back into their trough to decompose and return to the soil. All our bell pepper plants were volunteers this year and we still have about 50 peppers in the foliage.  We will add a little chicken poop and new soil in the spring. 

SIDE NOTE:We also keep the eco-systems intact at the end of their growing season until the next one. So don’t dig up the roots of those ‘done’ plants. LEAVE IT. Trim off the vines and foliage but leave the roots!

How do we make compost soil?  

I love this question as my husband has the magic touch for this!  We started out composting only grass clippings, dying sod, leaves, dead plants in a large black composter. At the time we also had a worm farm going that we had intentions of using the organic fertilizer they make while eating veggies, fruit and paper.  All the worms escaped as I unintentionally left their escape hatch open. (Oh the things one learns in 7-8 years!)  

 After their break away, we started adding food scraps, coffee grounds etc., to the              composter.  We do NOT add meat scraps for two reasons: A) We have dogs so there are no scraps and B) the smell would be something I couldn’t handle. We compost year round so the ‘soil’ created by Spring is very rich.  We got chickens so their waste was added to the Composter as well as egg shells.  It all makes rich organic soil in the Spring!  Ours breaks down quickly because the Red Wiggler Worms we had in the farm made their way into the composter! We continue to have zillions of worms in the composter feasting on the matter that is thrown into it. 

There are a ton of ways to begin a compost pile and you have the land and animals to help you begin to have a GREAT composting area!  You and Scott could figure out a space to build a 3 sided  compost holder or just make a pile.  You will have to mix it up to get a good blend of all you add to it.  Our composter tumbles so it easy to mix. Here is a good website for beginning.  We did ours without knowledge and learned as we went along.   

https://www.lawnstarter.com/blog/lawn-care-2/composting-101-how-to-start-your-first-compost-pile/ 

2. Scabby Apples: 

First of all, YAY for getting fruit from your new babies!!!  Second, we have experienced this too and the cause is supposed to be quite simple - not enough sun or air flow through the branches. 

Two of our trees are 22 years old and one is 27 so Mike has gotten pretty good and pruning them but this year, with all we’ve had going on, the pruning wasn’t quite as clean as in years past. One needs to keep the crown of the tree open to allow the sun and airflow.  Also this summer we failed to keep the fallen apples and leaves raked up as I needed a lot of help before my surgery which was time consuming for Mike. 

The scabs are like a little fungus but our good news is only one of the trees was really affected. Wet, wet, wet leaves are the culprit and we had a lot of rain when the apples were first forming and growing. 

We also didn’t keep the sprinkler low and so the water hit the fruit and the trees which exacerbated the problem. Live and learn. Next year it will be kept low!  You can treat the trees with spray if you so choose.  We don’t and won’t.  

Another thing we do is put out apple cider vinegar in small containers to take care of the fruit flies that create worms.  Change it often. Once a week is good.  We’ve had GREAT success with this.  

Another good thing about scabs on apples.  They are only on the surface so after you pick the apples and wash them, you can peel them and use them.  YAY!  The pruning and the apple cider vinegar allow the apples to be bigger at harvest time! 

Winterizing your Fruit trees:

Do NOT fertilize them right now! You don’t want to encourage new growth.  Pruning is done in late winter when the trees are completely dormant. Mike prunes in late February or early March.  He freezes but he does it!  NOW IS THE TIME to water a couple of times deeply each fruit tree.  Super simple to keep your babies happy through winter into early spring!  This is all we do.  Nothing more, nothing less. 

Dolomite Lime: 

We’ve never used it but there’s nothing wrong with it if it’s used properly on the trees that need it. I did a little research (quick) to see if it was harmful and I learned a lot in a little bit of time.

Apples and pears do not. Using it on those trees may kill them. They don’t need the soil to be acidic so personally, I wouldn’t use it. Citrus trees, like the Meyer Lemon are cold hardy but need a more acidic soil.  It may need it. I don’t know.  I recommend you test the soil first before ever applying the dolomite lime. Citrus tree soil should rank 6.0-8.0 while the apple and pears soil PH should be more alkaline, like 7.5 or something.  Peaches or other stone fruit like a slightly acidic soil which if you got fruit from any of these, I would think the soil is fine.  I would do your research if you want to apply anything to your trees. We’ve done nothing to ours and we get an abundance of fruit.  

I’m always happy to help so if there are more questions, comment below and I will answer them as quickly as I can! I appreciate all these questions as it is sometimes a learning opportunity for me as well! Thank you again!

As Always - Love, Light and Peace!

The Garden that keeps on Giving

As Backyard Farmers, our job is never done. I we aren’t sprucing up the flowerbeds, chopping and stacking wood, we are harvesting various garden gifts. Pictured is our latest bounty. Jalapeños, Sriracha Peppers, Jimmy Nardellos.

The cherry tomatoes from a ‘volunteer’ tomato plant growing along side another ‘volunteer’ beefsteak tomato plant that has taken over the Pea and Bean trellis. By “taken over” I mean it’s over 8 feet tall and has numerous clusters of tomatoes on it! The cherry tomatoes are just a bonus plant!

Such is life on the farm when you create your own composted soil. Sometimes there is a volunteer plant or two. In our garden, we have many. Pumpkins, Tomatoes and Spaghetti Squash have been the discoveries thus far. We are so grateful for all that the garden provides but sometimes, the endless processing can be overwhelming. No complaints here, just always busy!

Today is another busy day! Processing the latest bounty. Dehydrating the jalapeños which, when finished, will be gifted to our daughter and her family. Sriracha peppers and the Jimmy Nardellos will be frozen for later use. Peppers do not lose their crunch when frozen so it’s a good way to preserve them for long term. You also do not have to blanch them. Jimmy Nardellos can also be strung up to dry in front of a window but we really don’t have a sunny space for them to dry. Too many beautiful trees and the house faces North to South. I really don’t think anyone wants drying peppers in their bedroom windows. Cherry tomatoes can be dehydrated, canned or frozen. We will dehydrate these and add them to our others and use to make tomatoes soup on a cold winter day!

We are fortunate that processing this produce will only take about an hour start to finish. The rest of the day will be spent getting our travel trailer out of storage and bringing her home to be winterized and, as it is October, decorating for Halloween!

General Information:

Wash all your harvested yummies before you do any processing. Even though we don’t use any chemicals in our soil or on our plants, we still wash our harvest.

If you choose to freeze your Peppers, dry them. Place them is airtight containers as they will last 3-6 months. We put ours in Vacuum Sealed bags which can give you an even longer freezer life.

Individual Temps for Dehydrating:

Jalapenos: Slice them into 1/4 inch rounds and place on dehydrating trays, not touching, and dehydrate at 125 degrees and let them go for approximately 10 hours. I always check them after 8 hours, removing the completely dry ones. They will be hard and no softness remains. Keep the others in the dehydrator, restart and check the rest every two hours or so. Let cool and store in airtight containers. We use mason jars.

Tomatoes: Cut the cherry tomatoes in half and place them on the dehydrating trays skin side down. Set the dehydrator to 140 degrees and let the tomatoes ride for at least 9 hours. Check them at this point to see if all the softness has gone. They should be crisp. Let the tomatoes cool and store in airtight containers. We use mason jars.

As always, Love, Light and Peace!

Please feel free to leave a comment or ask a question. All unkind comments will be deleted.

Latest Harvest

Potato Soup/Bisque - Garden Goodness

As many of you know, we grow in our garden most of what we use in our kitchen when cooking. Veggies, herbs, spices, etc.. When we can’t we buy the healthiest products we can on the market, from local farm stores or barter with others who share our same philosophies about quality of the foods we put into our bodies how their grown or raised. When I share a recipe with you, unless I will specify when using other acquired sources. For example, instead of a homemade spice blend, I will say, we used McCormicks. If use another brand, it is because I have researched the product, the processing and the ingredients used. I do not expect you to follow my lead. It’s just what WE do.

I had too much fun last night creating a recipe for, what was supposed to be a simple potato soup. I had several kinds of potatoes that needed to be used, an onion and some garlic so naturally my mind went to potato soup. It started out innocently enough but then I began creating a not so simple dish. If you know potato soup recipes, they are pretty straight forward so I started with the basics.

In our potato basket we had a couple of LARGE Sweet Potatoes, some Russets, Red Potatoes and a few Yukon Golds. There was also a big sweet onion and a couple of garlic bulbs so I knew I had the basic ingredients needed for the soup. I started chopping up the potatoes, onion and OH! why not throw in a carrot and celery? With all of this garden produce chopped, I realized that I was going to need A LOT of chicken bone broth, which we always have on hand, either homemade or Pacific Foods . For this recipe I used 96 ounces of Pacific Foods bone broth as our homemade was frozen. I usually plan out what I want to make for dinner so I can make sure everything is thawed, picked, washed and ready to use. This was a spur of the moment decision so store bought bone broth it was.

I enlisted the help of my Sous Chef, my husband, Mike to help me with my creation. He is a REALLY fine cook in his own right and I love that he is more than will to help me in the kitchen. We have such fun cooking together! I remembered we had a pound of uncured bacon in the fridge so Mike cut it all up and cooked it to bacon bit crisp at the same time he took a large garlic bulb, peeled it and minced it for me. He knows that garlic needs to sit for 10 minutes prior to using so that all it’s magic powers start working and flavor is at its peak, so he gets it done first!

I sautéed the garlic and onion in Ghee. Honestly, when I make this recipe again, I will use olive oil instead. Another alternative would be to whip some Earth Balance and then sauté the garlic and onion in that. Ghee was just a bit stronger of a taste than I was after. IT WASN’T HORRIBLE by any means. Just a bit stronger than I would have liked. Anyway! Once the onion was translucent (takes 3-5 minutes,) I added in all the veggies, plus the chicken stock, brought this to a boil, then turned the heat down and let it simmer for about 30 minutes. During the simmering time, I grabbed some of our dehydrated mushrooms and threw those into the mix. About a half cup or a handful. . . who measures?! I thought it was a good way to sneak in a little extra power punch. Only the Sous Chef knew of my secret ingredient!. . .hee, hee, hee. . .

Once the veggies were soft, I turned off the stove and used my favorite kitchen tool, the Immersion Blender and blended everything together until it was creamy. One can also use a blender to do this same step. The soup is super hot so be careful! Once the soup was blended, I turned back on the burner to low and started adding spices. Salt, Pepper, Cajun Seasoning, Paprika and a little bacon grease with a couple of tablespoons of cornstarch mixed in. The cornstarch is a thickener even though the soup itself was already a little thick, it helped bring it to the consistency that I wanted for this recipe. Yep, this soup definitely has a kick to it.

First of all, the spices are optional - aside from the salt and pepper. Those two are necessary! Potatoes absorb salt so go ahead and use it. In my household it’s really for the benefit of others as I don’t use that much. In fact most of the time I don’t use it at all and suggest to others if they want to use it, they can do so once they’ve dished up.

Second and getting us back on track, once the spices were cooked in and the taste was balanced, I added in 2 1/2 cups of (whisk) whipped unsweetened Coconut Milk, full fat. I use Thai brand. I then used the Immersion blender once again to cream it all together. I added the bacon crisps, one pound worth, minus a few pieces the dogs enjoyed and served it in bowls garnished with parsley. The finished product is less a soup and more a bisque. We were all okay with that! I’m thinking we should add shrimp to it for tonight’s dinner!

A few note: 1 pound of uncured bacon, was voted by the fam to not be enough. They suggest 2 pounds. For the amount we made, I agree. The soup can be frozen in airtight containers or quart jars. Use within 3 months. You can also use your own brand of products. I use these because we cook food that are celiac friendly and as organic as possible. BELOW is the recipe.

Potato Soup/Bisque -Robin Miller 2022

Ingredients you will need:

2 Large Sweet Potatoes, 4 Russet Potatoes, 4 Large Red Potatoes, 4 large Yukon Gold Potatoes chopped into 1 inch cubes - set them aside.

1 Large Carrot chopped into small cubes plus 1 large stock of celery or two small and leaves, chopped into thin slices.

1 Large Sweet Onion and 1 whole bulb of Garlic

1-2 pounds of Uncured Bacon, chopped and cooked to a crisp - making bacon bits

2 - 2 1/2 cups Full Fat Unsweetened Coconut Milk - you will use a little less than two cans or use it all but whisk it before using so it’s blended and creamy. It will NOT be blended when you open the cans. Nobody told me this when I started using it eons ago so I’m sharing the info with you!

Salt and Black Pepper - to your taste but do NOT start tasting until you add spices. Potatoes absorb salt so you won’t be able to tell how much you need if you add while cooking down the veggies.

McCormicks Cajun seasoning - we usually make our own but ran out so this is the next best thing for celiac humans. We used about 3 Tablespoons but again, it’s for YOUR taste buds add what you want.

Paprika - make your own or store bought, again McCormicks is or go to when we run out of homegrown/made.

2 Tablespoons Cornstarch - if needed to thicken

Parsley and green onions, chopped for garnish.

PROCESS: One 8 quart soup pot

Cook Bacon and set aside to drain on a clean towel or paper towels

Sauté Garlic and Onions until the Onions are translucent

Add in all the veggies and chicken bone broth bringing it all to a boil. Once it is boiling, turn down the heat and simmer for about 30 minutes or until veggies are soft. While it is simmering, throw in a handful of mushrooms either dehydrated or fresh. If the fam hates mushrooms, hide them under all the other veggies while it cooks!

Once veggies are soft, turn off the heat, use either your Immersion blending tool or a blender to cream all the veggies. Add more chicken bone broth at this time if you think the soup is too thick for you and skip the cornstarch.

Return to heat and start adding the spices for your taste - it’s your soup and you are in charge of it’s final taste. You can also choose to use different spices than we did. If you want it savory use herbs like rosemary, thyme, etc. PLAY AND HAVE FUN!

Once you’ve seasoned to your perfection, turn back off the heat and add in the Coconut Milk and blend once again to cream further. Your soup is now ready to be served. Garnish with more Bacon, Chives and or Parsley. ENJOY!