When my mind is in a creative mode, it makes for sleepless nights because it’s when I’m clearest in my thinking. Supplies are envisioned and nothing is safe from possibly being used that is found inside the walls of our home! I will recycling and upcycling whatever I need to bring a project to fruition. Thinking outside the box is common for me as every project has to have a story when completed and on display. Last night my mind decided to kick into overdrive at 1:30 am. The excitement in my mind was so loud that getting out of bed was the only option.
What had my mind going? Enhancing my Gnome village I had built a couple years ago by paying attention to the trees that surrounded it. Some of the trees stand four feet tall and held ornaments but none that matched the village theme. Earlier in the evening I remembered seeing cute little Gnome ornaments being made at some point in the past. I felt that little spark ignite and instead of staying lit until the morning, my brain kept feeding it fuel to burn brighter, bigger, longer. I had to figure out how to create a pattern. Some people are driven to knit a sock and I was determined to create a Gnome. I found a picture of a Gnome head online and figured it out from there.
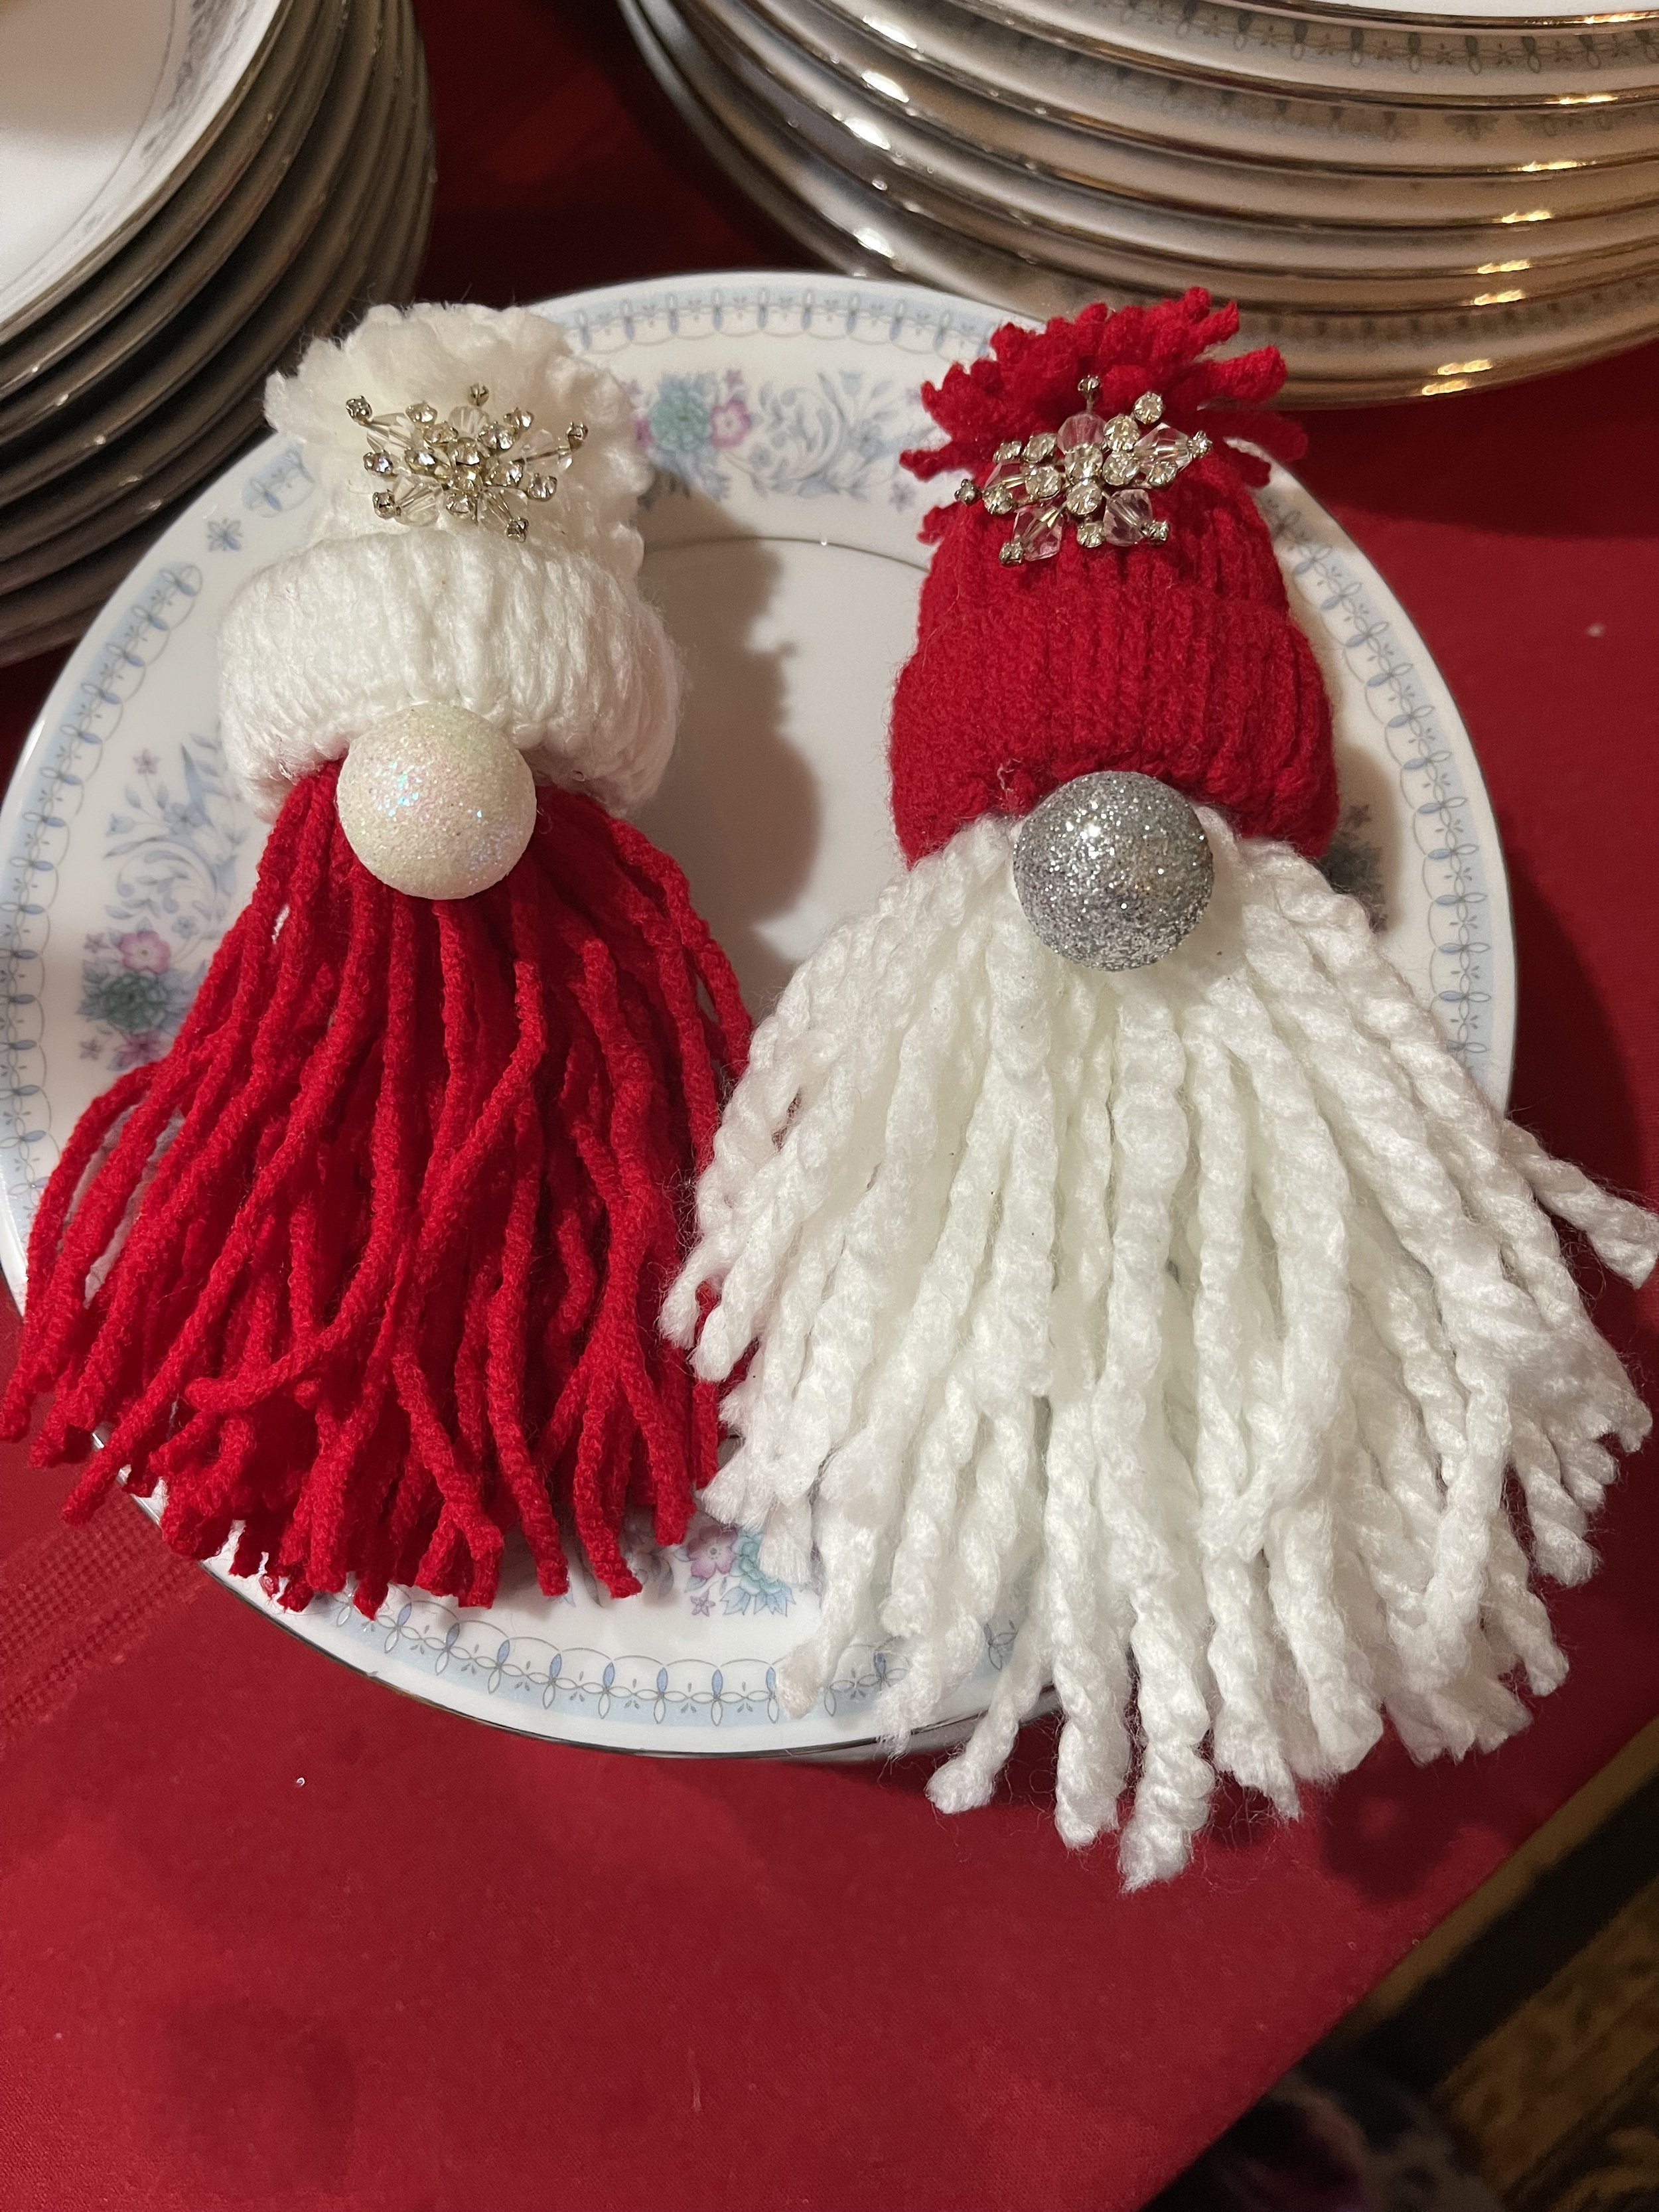
I’ve created 14 Gnomes. Each one gets easier and more simple. I can now add variations to the hats, beards, embellishments. I think I have the main pattern down for you to start with. I encourage you to do your own touches. Don’t be afraid to be creative.
With the instructions, there are a correlating pictures for help with each step. Some have one photo, some steps have more as I wanted to be clear in the instructions. Once you make one or two Gnomes, you will be able to make them without the pattern. Let’s get started!
SUPPLIES:
Scissors
1 or 2 different colored Yarn - Small, Medium or Large will work, depending on the size of your hat rim.
1 Empty Toilet Paper roll center or empty Paper Towel center -a toilet paper roll will make about 5 hat rims - depending on how wide you cut it.
- a paper towel roll will make 10-12 hat rims
- there are other options too. The larger the circle the larger the yarn is my rule of thumb. 1 rectangle of cardboard measuring 5” x 6” or not. See side note in step #8.
4 Cotton balls or Small piece of batting/pillow stuffing. Chunky does NOT work.
Hot Glue Gun and Hot Glue - I’m sure you can use fabric glue but it takes to long to dry for me so I don’t use it for these kinds of projects.
Something lightweight for a nose
OPTIONAL: for the nose and hat decorations
Baubles, Bangles, Beads, tiny ornaments, bells, rick rack, rocks, etc.
INSTRUCTIONS FOR THE GNOME HAT:
Cut 1/2”, 3/4” or 1” from your empty TP roll and set it aside.
Pick a yarn color and cut 50 - 12” strings and set them aside. To do this you can short cut this step if you know how. Remind me if I forget to include this helpful hint. You do NOT have to be exact in your measurement. Eyeballing it or approximate is okay! I normally measure nothing. SIDE NOTE: You may or may not use all 50 strands of cut yarn but it will be darn close each time.
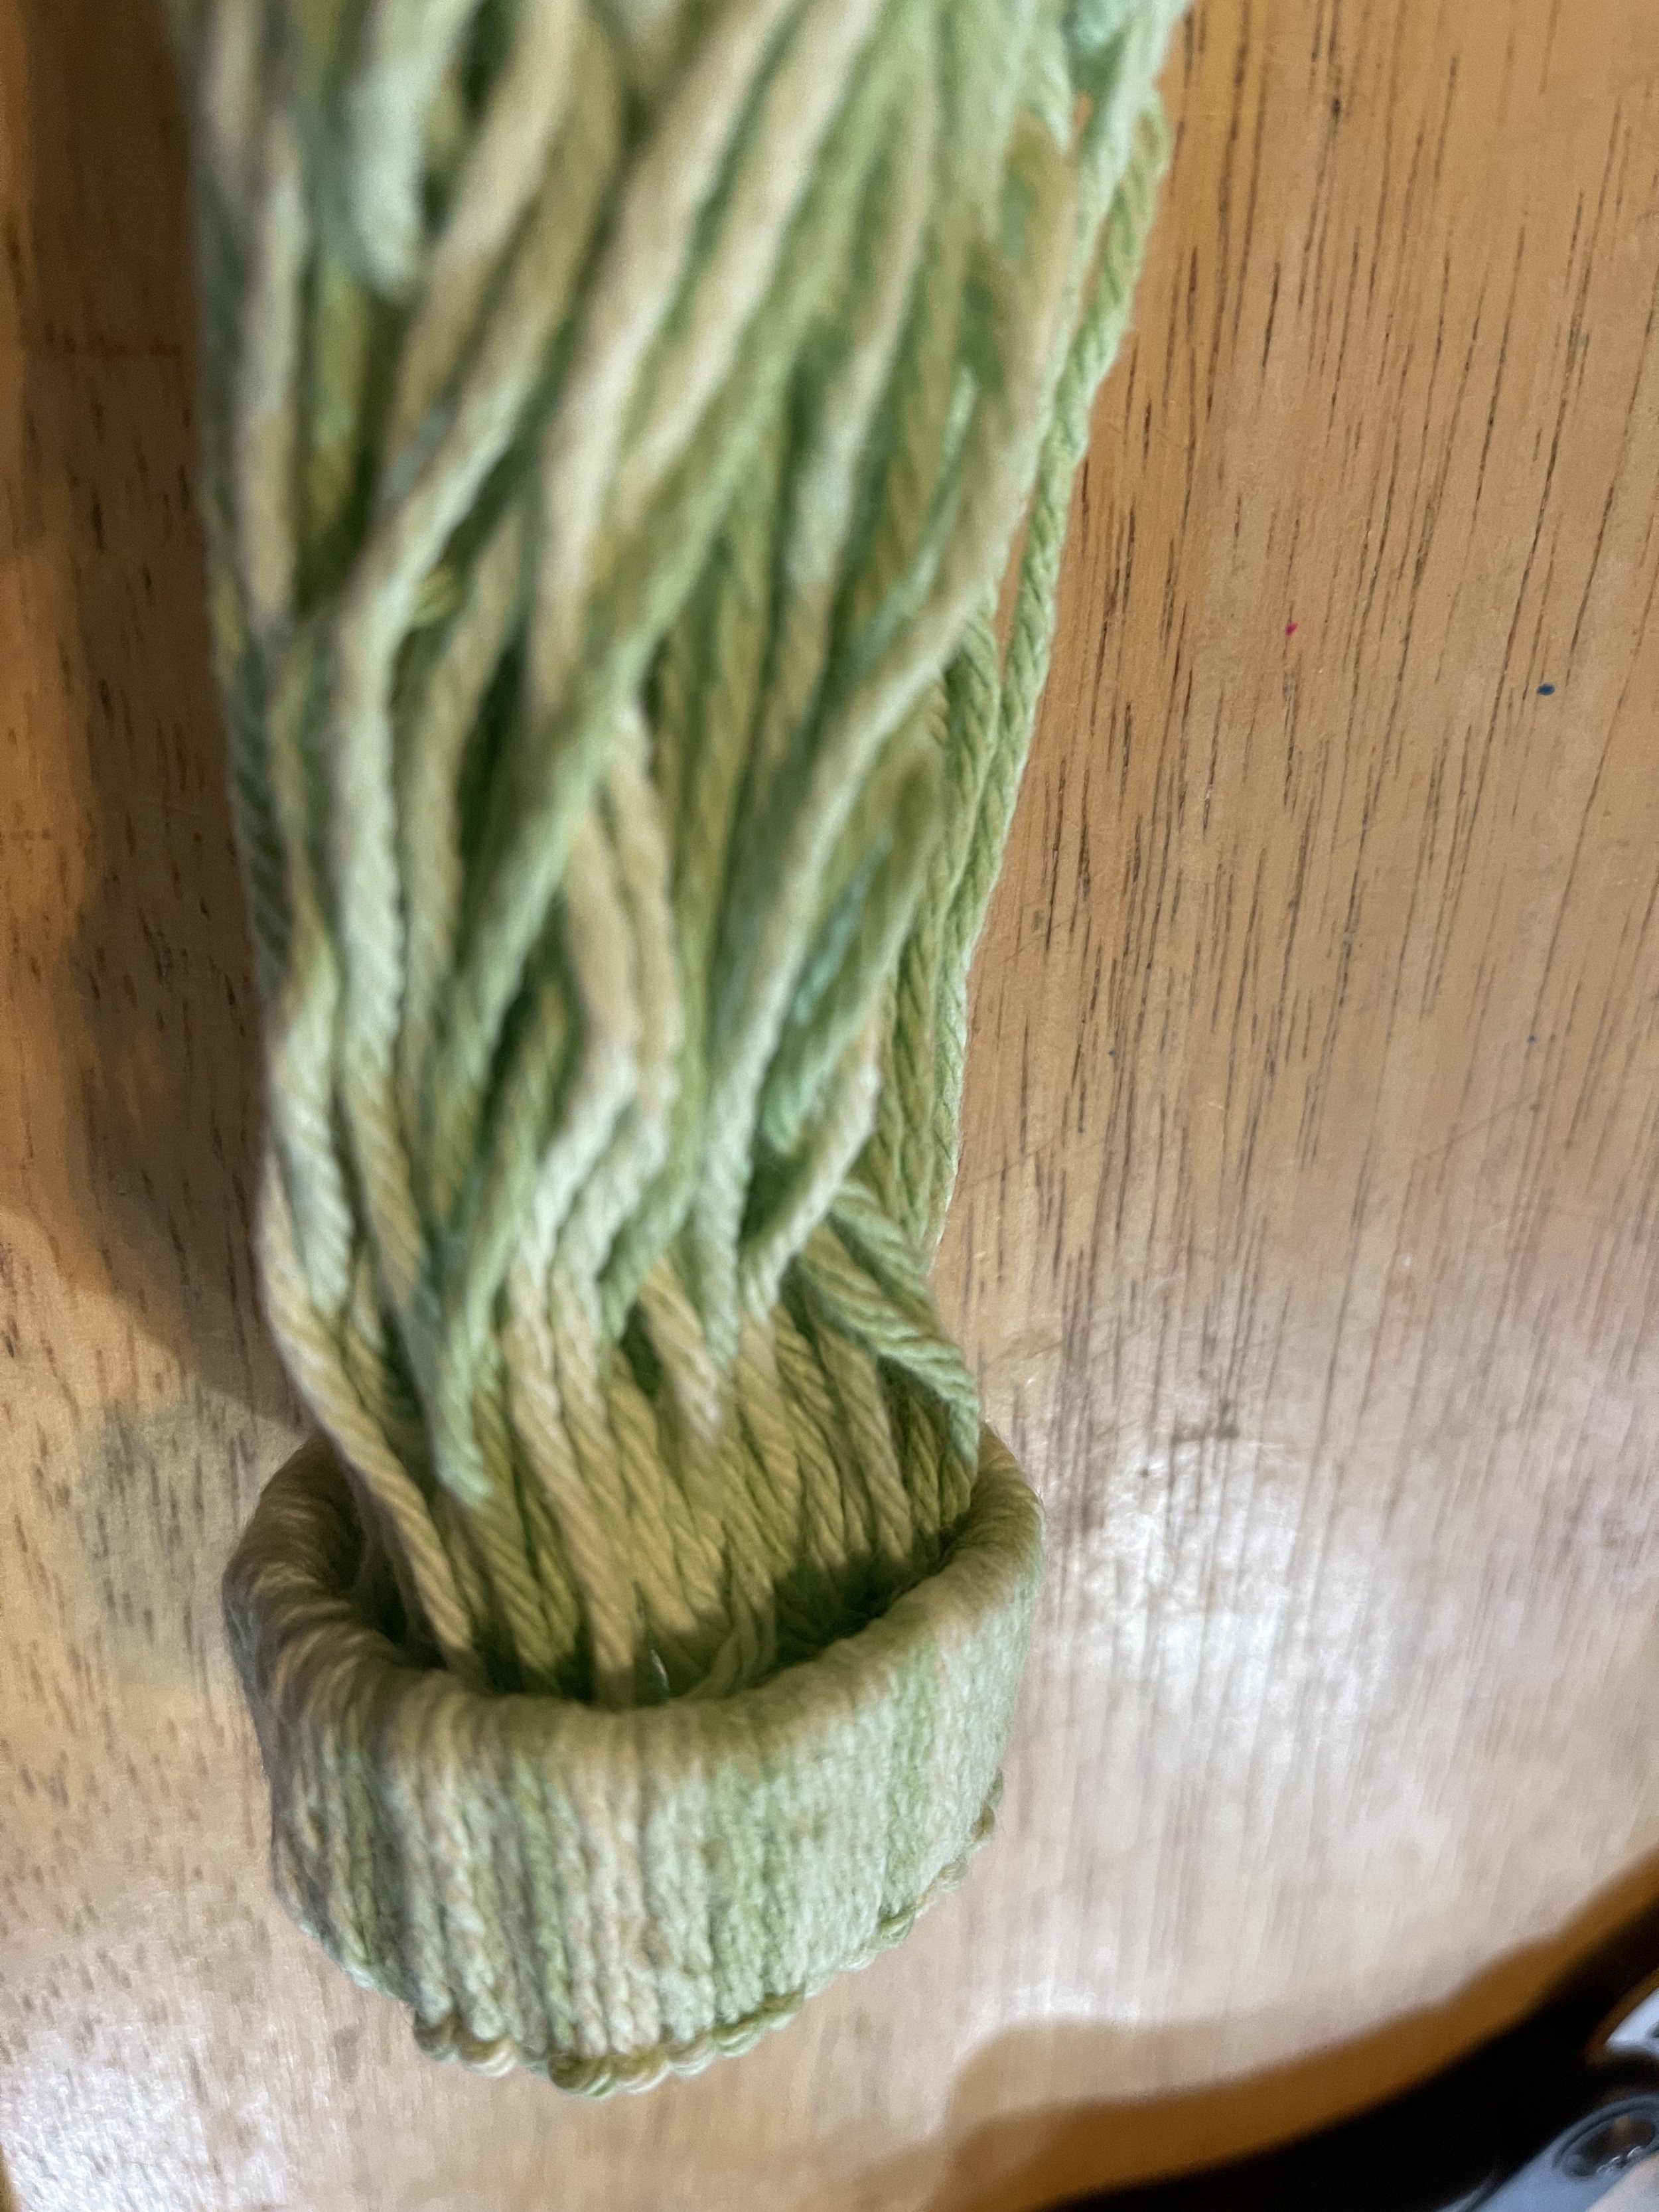
Loop each string around the TP roll making sure each loop if going in the same direction, snuggled up next to each loop. Your project will start to look like a jellyfish. The way you lay your loop through needs to be the direction of every loop created thereafter. My loop was threaded through right to left. This creates a finished brim look to your hat. Make sure each finished loop it tight against the last. No cardboard showing is key!
Once your loops are in place all the way around your ring, Push the loose ends through the center of the ring so the yarn strands are now dangling from the opposite side.
With a separate piece of yarn, tie all the strands of yard together about an inch or two above the hat rim. Tie it tight!!
Trim excess yarn above the tie to form a pom pom for the top of your hat. Set your hat aside.
Stuff the cottontails - 3-4 of them- inside hat
INSTRUCTIONS FOR THE BEARD:
Choose a second colored yarn.
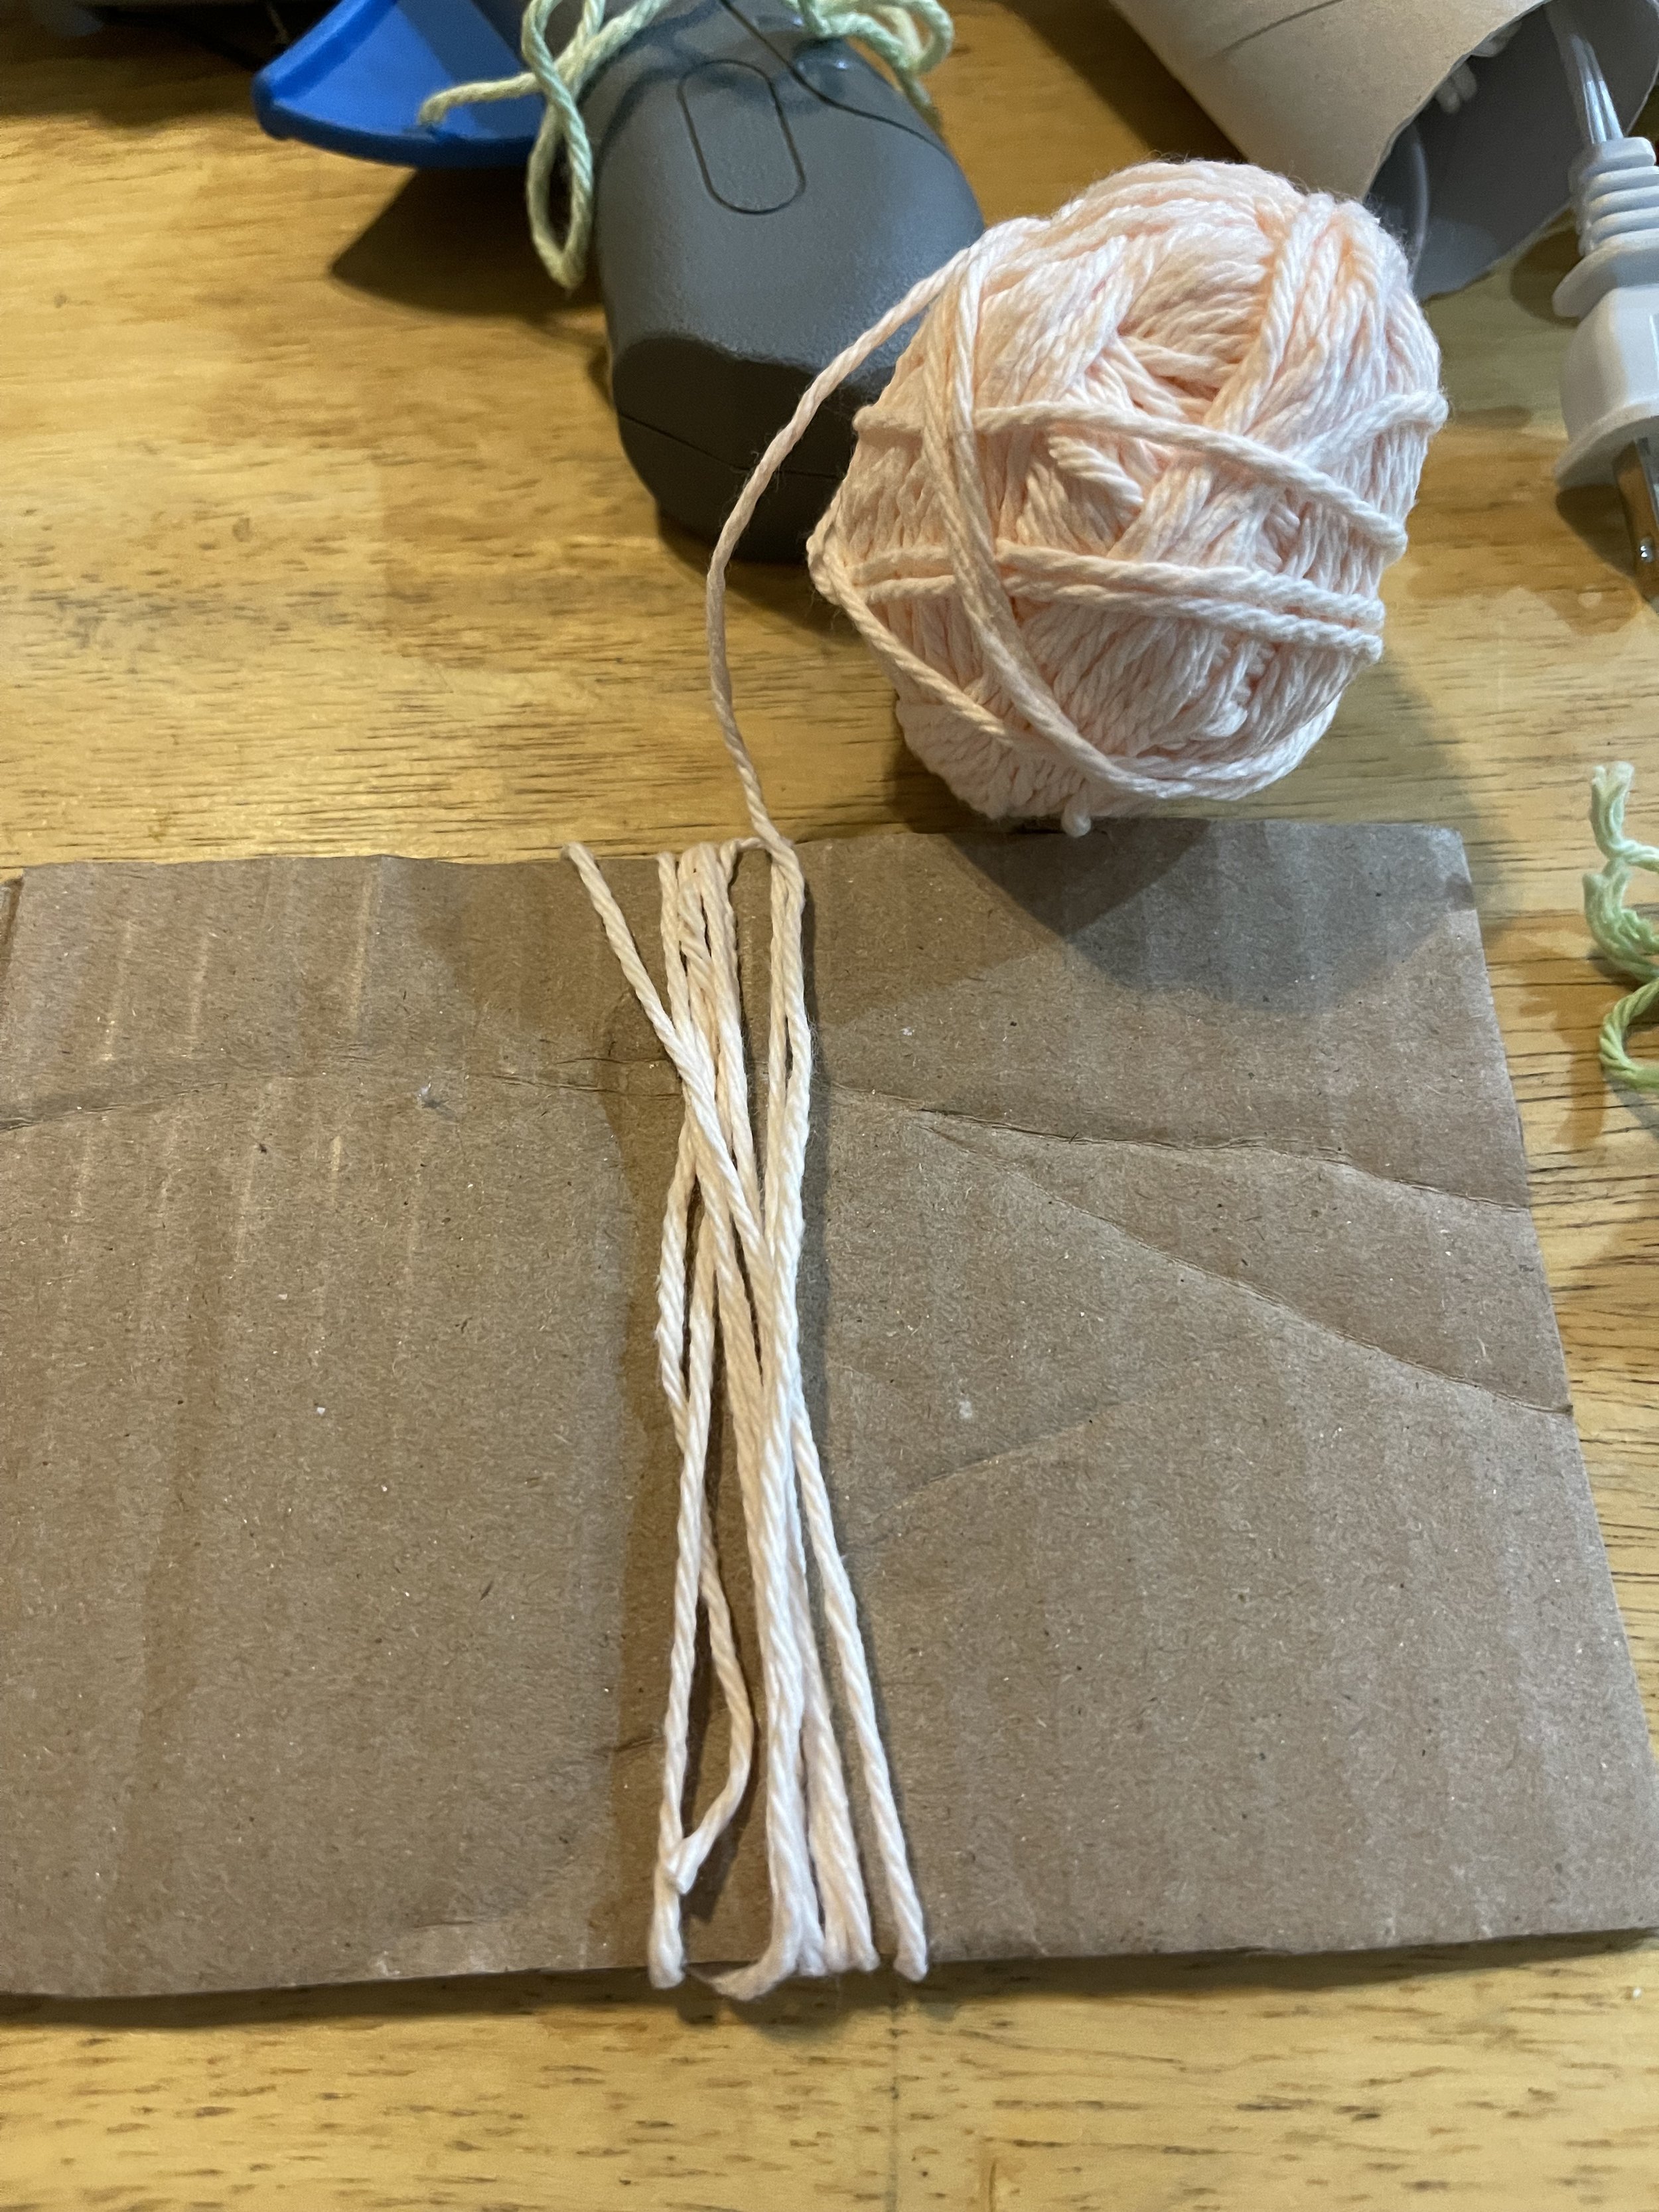
Using your piece of cardboard, wrap the new colored yarn around either the short or long way - I used both options - make sure you wrap it at least 40 rounds leaving the ends loose. Holding onto one side of the rounds (fingers through the loops,) Remove the loops from said cardboard. Lay on the table and tie the rounds together at the center - see pic for example.
Side Note: I discovered after making 5 Gnomes that the cardboard is not needed using an alternative method that is as follows: Cut 25-30 pieces of yarn that are
approximately 8” in length. Stack them and tie them in the middle. Trim or don’t trim to create the beard.
Hot glue the beard to the cottonballs and hat inside the rim.
Add Nose (and hat adornment if you so choose.)
*All yard is from ‘good intention’ projects that either were finished, 1/2 way finished or never started. Cottonballs were under the sink for a couple years as Mike hasn’t needed them to create more firestarters. (Cottonballs + vasoline or wax.) The noses are mini Christmas balls from some decoration I took apart at some point in my life. The embellishments: Snowflakes are upcycled hair pins I wore in my hair while marrying Mike. The crystal leaves are also from our wedding decor and the stones are from the Gnome Village. **
Did you make a Gnome? Please let me know in the comments and post a picture of your amazing creation. Have fun! As Always, question or clarity needed? Just ask!
Love, Light and Peace!


